How to Fix Undersized Egress Windows and Frame Rake Walls During a Home Build
- DreamDen AI Editorial Team
- Nov 7, 2025
- 3 min read

When building or remodeling a home, it’s easy for design changes to affect safety and compliance. One of the most common oversights happens with egress windows—those required in bedrooms and certain living spaces to allow emergency exit or rescue. This blog explains how to correct window openings that don’t meet code and how to frame rake walls under a sloped roofline.
Correcting an Egress Window Issue
Egress windows are required by code to provide a safe escape route in the event of an emergency. Each window must meet specific size and clearance requirements.
The Problem
After repositioning two bedroom windows for a better layout, the openings became too small to meet code. The clear opening was about 3.7 sq. ft., while building code requires a minimum of 5.7 sq. ft. for an egress window.
Why It Matters
A properly sized egress window must be large enough for a person in full gear—such as a firefighter—to pass through.
Both the window type (casement, double-hung, slider) and the rough opening size affect whether a window meets code.
The Fix
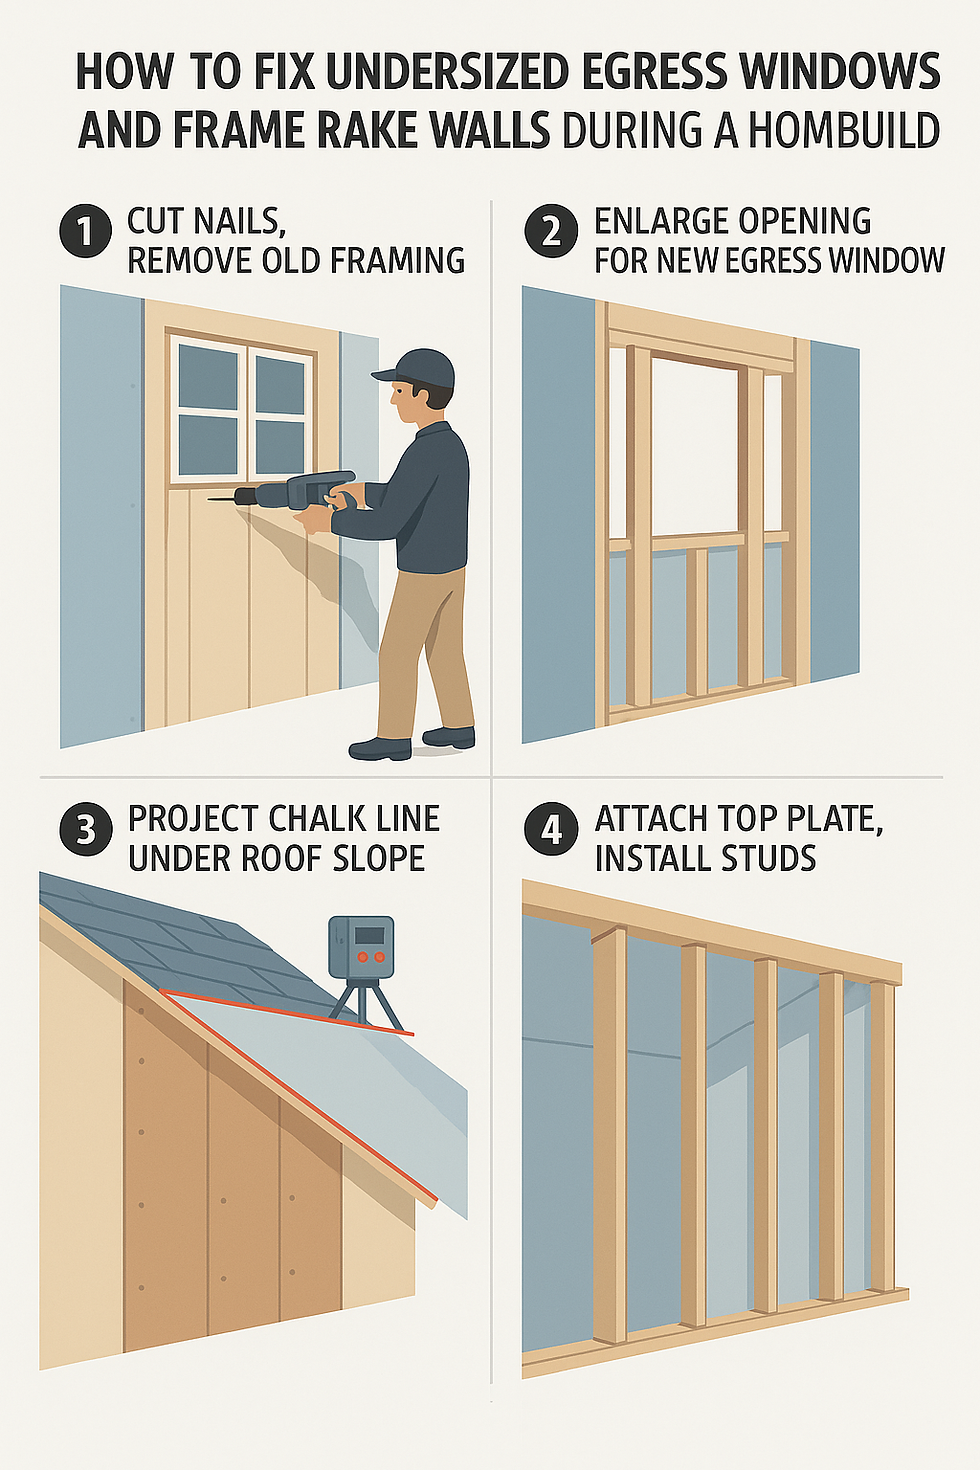
Calculate the new opening - Casement windows typically provide more clear space than double-hung models. In this case, enlarging the rough opening to 29¾ inches met the egress requirement.
Remove the old framing - Use a reciprocating saw to cut nails between studs and sheathing, then take out the sill and header.
Install new framing members - Replace the sill, header, and side studs to match the new opening width.
Reinforce and verify - Check that the new opening is square, level, and properly supported before reinstalling the window.
Tip: Always confirm egress requirements for your local jurisdiction before ordering windows or modifying framing.
Framing a Rake Wall Over a Beam
A rake wall follows the slope of a roof and fills in the space between the top of a structural beam and the roofline. These walls provide support for drywall and insulation where ceilings are vaulted.
Purpose
Supports drywall along sloped rooflines
Provides backing for ceiling finishes
Helps tie the roof structure to the main framing
How It’s Done
Install backing -Secure sheets of structural material, such as Advantech or plywood, along the trusses and beam. This provides a base for the top plate of the new wall and adds drywall blocking.
Establish a reference line - Use a laser level to project a line along the slope of the roof and mark it with a chalk line. This ensures the rake wall stays plumb.
Cut and fit top plates - Rip plates to match any tight spacing near truss cords.
Measure and install studs - Because the roof pitch changes the stud lengths, measure each individually. Place studs 16 inches on center for standard framing.
Check alignment - Confirm that the wall aligns with the laser reference and that all framing is flush with the beam and ceiling structure.
Finishing Up
After resizing the windows and framing the rake walls:
All window openings met egress standards.
The rake walls were aligned, plumb, and ready for drywall.
The adjustments reinforced safety, structure, and code compliance without major redesign.
Key Takeaways
Egress openings must meet both height and width minimums to achieve the required 5.7 sq. ft. clear area.
Casement windows can meet egress size with smaller frames than double-hung styles.
Use lasers and chalk lines for precise rake wall framing.
Measure each stud individually when working under sloped ceilings.
Check all local codes before modifying framing or installing windows.


header.all-comments