How Much Does it REALLY Cost to Paint a Room?
- DreamDen AI Editorial Team
- Sep 19, 2025
- 13 min read

Updated: Oct 24, 2025

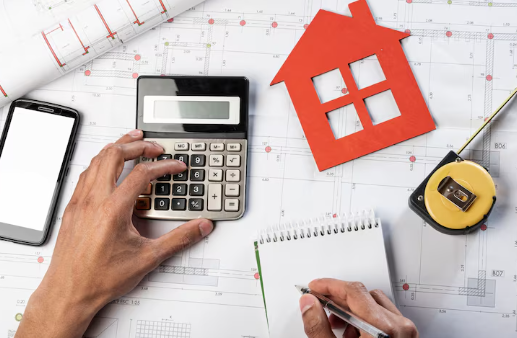
The expense of painting a room in the USA generally falls between $150 and $800, with a national average of approximately $350 to $400 for a typical 10x12 foot room. The cost varies based on factors such as the room's size, labor rates, the job's complexity, and whether you choose to do it yourself or hire a professional. Hiring professionals for a standard 10x12 foot room usually costs between $300 and $800, whereas DIY projects can be much more affordable, with material costs under $150 if you already have the necessary tools.

Labor Costs: Hiring a Pro vs. DIY
The decision to DIY or hire a professional significantly impacts your 12×12 room painting project’s cost. A common mistake we see is underestimating the time and skill involved in professional-quality painting. In our experience, hiring a professional painter for a 12×12 room can range from $300 to $1000, depending on factors like wall prep (repairing holes, sanding), the number of coats required, and the type of paint used. This price typically includes labor, but not materials.
Conversely, a DIY approach might seem cheaper upfront, but hidden costs can emerge. Consider the cost of purchasing high-quality brushes, rollers, drop cloths, painter’s tape, and potentially specialized equipment like a paint sprayer. Factor in the time commitment; a meticulous job could take a weekend or longer, representing lost wages or opportunity cost. You also risk subpar results if lacking experience, potentially requiring a professional fix later, negating any initial savings. Ultimately, weighing the value of your time and the desired quality of the finish is crucial when choosing between DIY painting and professional labor.
Preparation Costs: Priming, Supplies, and Surface Repair
Preparation often accounts for a significant portion of your overall painting costs, sometimes exceeding the paint itself. In our experience, neglecting proper prep is a common mistake leading to an uneven finish and ultimately, a need for repainting sooner than expected. Don’t underestimate the expense of surface repair. Cracks, holes, and imperfections need addressing; patching and sanding can easily add $30-$100 depending on the severity of the damage. Consider the cost of priming, essential for ensuring even paint coverage and adhesion, especially on porous surfaces or when changing from dark to light colors. A quality primer can cost between $20-$50 per gallon, depending on the type and coverage.
Beyond materials, factor in the cost of essential supplies. This includes painter’s tape (for clean lines), drop cloths (to protect your floors), brushes, rollers, and possibly a paint tray and scraper. For a 12×12 room, budget at least $50-$100 for supplies. For example, we recently worked on a project where extensive drywall repair pushed the prep costs over $150, highlighting the variability. Always remember that investing in high-quality supplies can save you time and effort in the long run, leading to a superior final result. Failing to account for these preparation costs can significantly impact your budget and project timeline.
Factors Influencing the Cost of Painting a 12×12 Room

Paint Type and Quality: Premium vs. Budget-Friendly Options
The choice between premium and budget-friendly paints significantly impacts both the final look and the overall cost of your 12×12 room project. In our experience, opting for a cheaper paint often leads to more coats needed to achieve even coverage, negating any initial savings. Premium paints, such as those with higher pigment concentrations, typically boast better hiding power, resulting in fewer coats and less labor. This translates to potential cost savings in the long run, even if the initial can price is higher. A common mistake we see is underestimating the importance of quality primer, which is crucial for optimal adhesion and finish, regardless of the topcoat’s price point.
Take these factors into account: Sheen affects both durability and ease of cleaning; higher sheens (such as semi-gloss or gloss) are more resistant to scrubbing but can emphasize imperfections. VOC levels (volatile organic compounds) affect indoor air quality; opting for low-VOC or zero-VOC paints is a healthier choice, though they can be more expensive. For example, a high-quality, low-VOC eggshell finish may cost 20-30% more initially than a standard flat paint, but its superior coverage and durability often make the extra cost worthwhile. Keep in mind that painting is an investment; choosing quality paint can save time, effort, and possibly money in the long term, resulting in a more attractive and durable finish.
Number of Coats Needed: Achieving Professional Results
The number of paint coats significantly impacts the final look and longevity of your 12×12 room’s paint job. In our experience, a single coat rarely provides sufficient coverage, especially on darker walls or those with noticeable imperfections. A common mistake we see is homeowners opting for just one coat to save money, only to end up with an uneven, patchy finish requiring a costly redo.
For professional-looking results, two coats are almost always necessary. The first coat, or primer coat, acts as a base, improving adhesion and evenness. It also helps to block stains and inconsistencies in the wall surface. The second coat provides the desired color depth and richness. Consider a third coat if you’re using a very light color over a dark one, or if you’re working with a low-pigment paint. We’ve found that using quality paint—with higher pigment concentration— often reduces the need for a third coat, saving you both time and money in the long run. Ultimately, the best approach is to assess your wall’s condition and the paint’s coverage after each coat. If the underlying color shows through or the finish isn’t even, an extra coat is recommended to ensure a long-lasting, beautiful result.
Wall Condition: Repairs and Surface Preparation
The condition of your walls significantly impacts painting costs. In our experience, neglecting proper surface preparation is a common mistake that leads to higher expenses down the line. Minor imperfections like small holes or cracks can be easily patched with spackle, a relatively inexpensive fix. However, extensive damage—such as water stains, significant drywall damage, or crumbling plaster—requires more intensive repairs. These could involve replacing damaged drywall sections, potentially adding hundreds of dollars to the overall project. Remember to account for the cost of materials like spackle, primer, and sanding supplies.
Beyond repairs, proper surface preparation is crucial for a professional-looking finish and paint adhesion. This includes cleaning the walls to remove dust, dirt, cobwebs, and grease. A common oversight is failing to adequately prime the walls, especially if dealing with highly absorbent surfaces (like new drywall) or surfaces with stains. Priming creates a uniform base for your paint, improving coverage and preventing the underlying color from bleeding through. Failing to prime can result in needing multiple coats of paint, thus increasing the total cost and time. Consider the additional labor costs associated with thorough surface preparation; it represents a substantial portion of the total painting time, often overlooked in initial cost estimations.
Detailed Cost Estimation for a 12×12 Room
Scenario 1: DIY Painting with Budget-Friendly Supplies
Tackling a DIY paint job in a 12×12 room with budget-friendly supplies can be surprisingly affordable, but requires careful planning. In our experience, the biggest cost savings come from choosing wisely. Opt for a high-quality, but affordable paint—don’t sacrifice coverage for price; two coats of good quality paint are cheaper in the long run than three coats of cheap paint. Consider brands offering good value like Behr or Kilz; their lower-tier lines often deliver excellent results. Remember to factor in primer, especially if painting over dark colors or significantly different sheens. A common mistake we see is neglecting primer, leading to more coats of paint and increased overall costs. Budget approximately $30-$50 for a gallon of paint and another $15-$25 for a gallon of primer.
Beyond paint, remember the essential tools. You’ll need brushes, rollers, and trays, but investing in quality roller covers is critical for smooth application. Cheap covers shed, leaving frustrating paint specks on your walls. A good set of brushes can be purchased relatively inexpensively and can be cleaned for reuse, significantly reducing long-term costs. Consider sourcing supplies from discount stores or waiting for sales, further reducing the expense. Adding up estimated costs for brushes, rollers, and other materials, you can expect to spend another $30-$50. Therefore, a DIY painting project on a 12×12 room using budget-friendly materials and your own labor could cost between $65 and $125 depending on the paint quality and amount of materials required. Always add a buffer for unforeseen expenses.
Scenario 2: Hiring a Professional Painter for a High-End Finish
Opting for a high-end finish significantly impacts the cost of painting your 12×12 room. In our experience, this often involves premium paints with superior durability and coverage, like benjamin moore Aura or Sherwin-williams emerald. These paints can cost two to three times more than standard options, immediately increasing the overall expense.
Furthermore, a high-end finish necessitates meticulous preparation, potentially including extensive patching, multiple coats of primer, and specialized techniques like color glazing or faux finishing. This meticulous approach necessitates a higher labor cost, as more skilled and experienced painters are required, typically commanding higher hourly rates or a greater overall project fee.
Consider, for example, a project we recently completed where the client specified a high-gloss finish on their custom woodwork. This added significant time for both preparation (to achieve a perfectly smooth surface) and application (multiple thin coats for an even sheen), ultimately increasing the labor component by approximately 40%. A common mistake we see is underestimating the time required for proper surface preparation when striving for a truly high-end result. Therefore, when budgeting, always factor in potential unforeseen complexities and allocate a contingency for additional materials and labor to ensure a flawless outcome. Expect to pay a premium for quality, but the result will be a significantly more durable and visually stunning finish that justifies the investment.
Scenario 3: Mid-Range Approach: DIY Prep Work, Professional Painting
This approach balances cost savings with professional results. In our experience, DIY prep work significantly reduces overall painting expenses. A common mistake we see is underestimating the time and effort involved in surface preparation. Thoroughly cleaning, patching imperfections (using high-quality spackle and sanding smooth), and taping off trim and fixtures can easily take a full day or more for a 12×12 room.
Professionally painting, however, ensures a high-quality finish and typically saves time. Expect to pay between $3 and $5 per square foot for professional painting, depending on your location and the painter’s experience. For a 12×12 room (approximately 144 square feet), this translates to a labor cost of $432 to $720. Adding the cost of mid-range paint ($30-$50 per gallon, depending on quality and type – you’ll likely need 2-3 gallons for good coverage), and essential supplies (roller covers, brushes, painter’s tape, drop cloths—approximately $50-$75), your total cost for this mid-range scenario will fall between $512 and $845. Remember to factor in the cost of disposal for any paint or prep materials.
Saving Money Without Sacrificing Quality: Expert tips and Tricks

Negotiating Prices with Painters: Tips and Strategies
Negotiating the price with a painting contractor is crucial to securing a fair deal. In our experience, many homeowners make the mistake of focusing solely on the lowest initial bid, overlooking crucial factors. A common pitfall is failing to clarify the scope of work *before* receiving quotes. Ensure your specifications are detailed, including primer coats, the number of paint layers, and any necessary repairs (e.g., patching holes, sanding). Ambiguity invites disputes and cost overruns later. For example, one client initially received a low quote that excluded patching and priming – adding significantly to the final cost.
To effectively negotiate, obtain at least three detailed proposals. Compare not just the total price but the breakdown of labor and materials. This allows you to pinpoint areas where savings are possible. For instance, opting for a slightly less expensive, yet high-quality, paint can yield significant cost reductions without impacting the final look. Don’t hesitate to ask for a breakdown of labor costs per room or per day. This transparency helps you identify potential inefficiencies and facilitates informed negotiation. Remember, a reputable painter will be willing to discuss their pricing structure openly and address your concerns professionally. Don’t be afraid to politely push for a better price, especially if you’re paying upfront or offer a timely payment.
DIY Savings: Mastering Essential Painting Techniques
Proper preparation is key to a professional-looking paint job, and significantly impacts your overall cost. In our experience, cutting corners here leads to more work (and expense) down the line. before you even pick up a brush, meticulously prepare the walls. This includes filling holes and cracks with spackle, sanding smooth, and thoroughly cleaning the surface to remove dust, cobwebs, and grease. Failing to do this properly results in an uneven finish and necessitates additional coats of paint, negating any cost savings. Remember, a smooth surface requires fewer coats, saving you both time and paint.
Mastering basic painting techniques also makes a huge difference. A common mistake we see is applying paint too thickly. This leads to drips, runs, and longer drying times. Instead, apply thin, even coats using a high-quality brush or roller. We recommend using a “W” pattern for walls and cutting in carefully around edges with an angled brush. For ceilings, invest in an extension pole for your roller to minimize ladder use and maximize efficiency. Consider using painter’s tape for crisp lines, but be sure to remove it *before* the paint dries completely. By mastering these techniques, you’ll achieve a professional result while using less paint and significantly reducing your project’s overall cost.
Choosing the right Paint: Maximizing Coverage and Durability
Choosing the right paint is crucial for both aesthetics and longevity. In our experience, opting for a higher-quality paint, even if it means a slightly higher upfront cost, significantly reduces the need for repainting in the future. A common mistake we see is underestimating the necessary coverage; cheap paints often require multiple coats, negating any initial savings. Look for paints with high hiding power, often indicated by a higher pigment concentration. Consider the sheen level—eggshell or satin offer good durability and washability for high-traffic areas while maintaining a soft, matte finish. Flat paints are beautiful but less durable.
For optimal durability, proper surface preparation is paramount. Before applying any paint, ensure the walls are clean, dry, and free of imperfections. Priming is often essential, especially on bare drywall or previously painted surfaces with significant color differences. A quality primer acts as a barrier, improving paint adhesion and preventing bleed-through. We often recommend a stain-blocking primer for areas prone to water damage or intense colors. Remember, investing in the right preparation and paint ultimately saves time, money, and frustration in the long run. Think of it as an investment that ensures your fresh coat of paint remains vibrant and beautiful for years.
Beyond the Basics: Additional Costs to Consider
Specialty Paints: Textured Finishes and Unique Effects
Moving beyond standard wall paints, specialty finishes significantly impact the overall cost of your 12×12 room project. Textured paints, such as those with a Venetian plaster effect, can add depth and visual interest. However, these often require skilled application—potentially doubling labor costs compared to a simple paint job. In our experience, a professional is almost always necessary for achieving a flawless finish with these complex materials. Expect to pay a premium for the paint itself, too; high-quality textured paints can cost upwards of $50-$100 per gallon.
Consider also the unique effects achievable with metallic paints, faux finishes (like marble or wood grain), or color washes. A common mistake we see is underestimating the time and expertise needed for these techniques. For instance, achieving a realistic marble effect requires a high level of skill and multiple coats, leading to substantial labor charges. While DIY is possible with some techniques, the potential for imperfections often makes professional application a worthwhile investment to avoid costly rework. Before committing, get multiple quotes from experienced painters, specifically highlighting your desired specialty paint and finish, to get an accurate cost assessment. Remember to factor in the additional material costs associated with these specialty paints.
Unexpected Expenses: Dealing with Unforeseen Issues
Unforeseen issues can significantly inflate your painting budget. In our experience, discovering extensive water damage behind wallpaper is a common, costly surprise. Repairing this before painting—which might involve drywall replacement and mold remediation—can easily add hundreds, even thousands, of dollars to the project. Similarly, finding lead paint in older homes requires specialized, and more expensive, abatement procedures, strictly regulated by local and national building codes. Failing to account for such possibilities can leave you scrambling for extra funds mid-project.
Another often-overlooked expense involves surface preparation. A seemingly minor issue like severe cracking or peeling paint might necessitate extensive scraping and patching before even a single coat can be applied. We’ve seen seemingly simple projects requiring significantly more prep work than initially anticipated, leading to increased labor costs. Remember to carefully inspect all surfaces and factor in potential repair costs for damaged walls, trim, or ceilings. This thorough assessment, while time-consuming, will save you considerable stress and expense during the actual painting process. A common mistake we see is underestimating the amount of patching required; always overestimate to avoid delays and extra expenses.
Additional Labor: Trim Work, Ceilings, and More
Painting a 12×12 room often overlooks the intricacies of trim work and ceilings. In our experience, these areas significantly impact the final cost and can easily add 25-50% to your initial labor estimate for wall painting alone. Trim work, including baseboards, window frames, and door casings, requires meticulous attention to detail, often involving multiple coats and careful masking to avoid paint splatters. A common mistake we see is underestimating the time required for proper preparation and clean-up in these delicate areas.
Consider the ceiling’s condition. Textured ceilings, for instance, take longer to paint due to their uneven surface and the need for more paint to achieve even coverage. Additionally, some homeowners opt for specialized finishes, such as high-gloss or metallic paints on ceilings, further increasing the complexity and, therefore, cost. Remember to factor in the potential need for extra labor if your room has intricate crown molding or vaulted ceilings. For example, one project we handled involved a client with ornate plasterwork, which increased labor costs by 75% compared to a simpler ceiling. Always obtain a detailed breakdown of labor costs from your painter, specifying the different elements involved, to avoid unexpected expenses.
Choosing the Right Painter: Finding a Reliable Professional

Finding Reputable Painters: Online Resources and Recommendations
Finding a qualified painter requires diligent research. In our experience, relying solely on online reviews can be misleading. While platforms like Angie’s List, HomeAdvisor, and Yelp offer initial screening, always cross-reference information. A common mistake we see is focusing solely on the lowest price without verifying licensing, insurance, and experience. Check for Better Business Bureau (BBB) accreditation and look for consistent positive feedback spanning multiple platforms. Don’t hesitate to investigate further; a quick phone call to confirm details can save you significant headaches down the line.
Beyond online resources, leverage personal networks. Ask friends, family, and neighbors for recommendations. Word-of-mouth referrals often provide the most reliable insights into a painter’s work ethic, professionalism, and attention to detail. For larger projects, consider requesting references and contacting previous clients directly to inquire about their experiences. This due diligence may uncover crucial details not readily available online, ultimately ensuring a smoother and more satisfactory painting experience. Remember to always get multiple estimates before making a final decision.
Interviewing Potential Painters: Asking the Right Questions
Interviewing a painter thoroughly before hiring is essential. Look beyond price and explore their experience and process. Many homeowners miss crucial details, such as asking about insurance and licensing. Verify credentials, as a reputable painter will provide proof of insurance to protect against liability. Also, inquire about their color matching and surface preparation methods, including the use of quality primers and handling imperfections. Request references and check online reviews to ensure their work matches their portfolio. Ask about their estimated timeline, payment schedule, and any potential hidden costs. By asking specific questions and verifying information, you can confidently select a painter who offers quality and peace of mind.
Reviewing Contracts and Estimates: Protecting Yourself
Examine any painting estimate carefully. A common error is neglecting important details. From our experience, a trustworthy painter will offer a detailed cost breakdown, covering labor, materials (specifically named paints and primers), preparation work (such as patching and sanding), and cleanup. Be cautious of estimates that are unusually low or lack detail; they might suggest hidden costs or poor-quality work. Always obtain multiple estimates for comparison.
The contract itself should be just as detailed. It must clearly outline the scope of work, including the number of coats, the type of paint used, and the completion timeframe. Payment schedules should be clearly stated, avoiding upfront payments over 25% of the total cost. Look for clauses addressing change orders (additional work), project delays, and dispute resolution mechanisms. A well-drafted contract protects both the homeowner and the painting professional. For example, a clearly defined clause about liability in case of accidental property damage significantly reduces risks for both parties. Don’t hesitate to consult legal counsel if you have any questions or concerns about the contract’s terms.


Comments