How to Install Fence Panels
- DreamDen AI Editorial Team
- May 19, 2025
- 6 min read

In this comprehensive guide, we will walk you through the process of installing fence panels from start to finish, ensuring a smooth and successful DIY project. We’ll delve into the tools and materials needed, planning and preparation, and the detailed steps of installation, concluding with maintenance tips to keep your fence looking pristine.
Tools and Materials You'll Need

Before you begin, gather all the necessary tools and materials. Having everything on hand will make the process more efficient and help avoid unnecessary delays.
Essential Tools for Installation
Tape Measure: Accurate measurements are crucial for a successful installation. A tape measure will help ensure that your posts and panels are placed correctly.
Level: Keeping your posts and panels level is essential for both aesthetics and stability. A level will help you achieve a professional finish.
String Line and Stakes: These are used to outline your fence line, ensuring a straight and accurate installation.
Post Hole Digger or Auger: These tools are necessary for digging holes for your fence posts. Choose based on the soil conditions in your yard.
Hammer and Screwdriver: These basic tools are essential for assembling the fence panels and fastening them to the posts.
Circular Saw: If your panels need trimming to fit your space, a circular saw will make precise cuts.
Power Drill: Useful for driving screws into the fence panels and posts.
Safety Gear: Safety goggles and gloves protect you from debris and potential injuries during installation.
Materials Required for Your Fence
Fence Panels: Available in various materials such as wood, vinyl, or metal, choose based on your style preferences and maintenance requirements.
Fence Posts: These provide the structural support for your fence panels and should be selected to match the material and style of the panels.
Concrete Mix: Essential for setting the posts securely in the ground.
Gravel: Used at the base of the post holes to improve drainage and stability.
Nails or Screws: Depending on the material of your panels, choose appropriate fasteners for secure attachment.
Wood Preservative: If using wooden panels, a preservative will protect against rot and weather damage.
Planning and Preparation

Proper planning and preparation are essential steps in any DIY project, and installing fence panels is no exception. A well-thought-out plan will save time and prevent costly mistakes.
Understanding Local Regulations
Before installing your fence, check with your local government or homeowners association for any regulations or permits required. Some areas have height restrictions, specific material requirements, or rules about fence placement. Failing to adhere to these regulations can result in fines or the need to remove your fence.
Accurate Measurements and Layout
Accurately measure the area where you plan to install the fence. Consider the terrain and any obstacles that may affect the layout. Determine the length and height of the fence panels you'll need, and calculate the number of panels and posts required. Consider adding extra materials to account for any errors or unexpected changes.
Preparing the Fence Line
Use a string line and stakes to mark the path of your fence. This will serve as a guide when installing your posts and ensure that your fence is straight. Double-check measurements and ensure that the lines are taut and level. This step is crucial for achieving a professional appearance and maintaining the structural integrity of your fence.
Assessing the Terrain
Evaluate the ground conditions where the fence will be installed. Is the terrain even, or will you need to accommodate slopes or uneven ground? Understanding these factors will help you decide on the installation method and any additional materials needed, such as additional gravel for stability.
Installing Fence Posts
The fence posts are the backbone of your fence, providing support and stability for the panels. Correctly installing these posts is critical to the overall success of your project.
Digging Post Holes
Use a post hole digger or auger to dig holes for your fence posts. The holes should be about one-third the height of the posts and roughly three times the width. For example, if your posts are 6 feet tall, dig holes that are 2 feet deep. Ensure that the holes are evenly spaced along the fence line to maintain a uniform appearance.
Ensuring Proper Drainage
Pour a few inches of gravel into the bottom of each hole. This will help with drainage and prevent water from pooling around the base of the posts, which can lead to rot and instability. Compact the gravel to create a solid foundation for the posts.
Setting Posts in Concrete
Place the fence posts into the holes. Use a level to ensure they are straight, then fill the holes with concrete mix. Follow the manufacturer's instructions for mixing and setting times. Allow the concrete to set fully before attaching the panels to ensure the posts are stable and secure.
Adjusting for Stability
As the concrete sets, periodically check the alignment and level of each post. Adjust as necessary before the concrete hardens. This will ensure that your fence remains sturdy and straight over time.
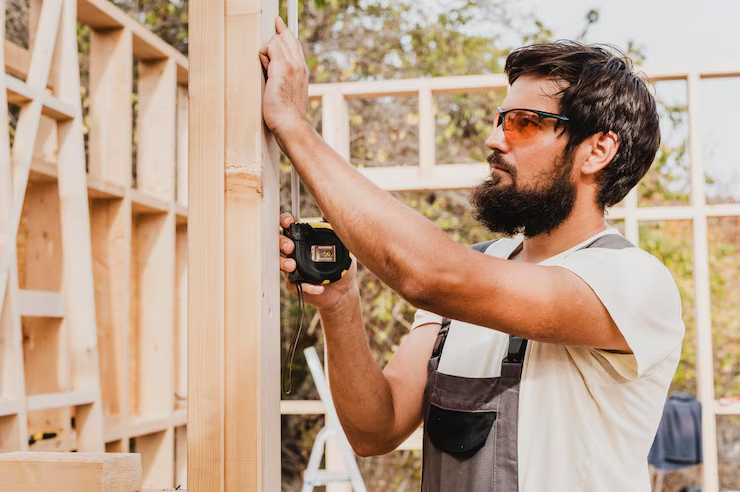
Attaching the Fence Panels

Once the posts are securely in place, you can begin attaching the fence panels. This step requires precision and attention to detail to achieve a polished look.
Positioning and Aligning Panels
Start at one end of the fence line and position the first panel between the posts. Use a level to make sure it's even. Proper alignment is essential for the overall aesthetics and functionality of the fence. Adjust as needed to ensure a seamless fit.
Securing Panels with Fasteners
Attach the panels to the posts using nails or screws, depending on your preference and the material of the panels. Ensure each panel is securely fastened before moving on to the next. Using the correct fasteners for your panel material will prevent loosening over time.
Continuation and Customization
Repeat the process for each panel, ensuring they are level and evenly spaced. If the panels do not fit perfectly at the end of the fence line, trim them as needed with a circular saw. Customizing the panels to fit your space ensures a professional finish and maximizes the usability of your fence.
Reinforcing for Durability
Consider adding brackets or additional screws for reinforcement, especially in areas prone to high winds or heavy usage. This will enhance the durability and longevity of your fence.
Finishing Touches
With the panels installed, there are a few final steps to complete your project. These finishing touches will enhance the appearance and durability of your fence.
Applying Protective Treatments
If you've used wooden panels, apply a wood preservative to protect against rot and weather damage. This will help extend the life of your fence and maintain its appearance. For vinyl or metal fences, consider applying a protective coating to prevent fading or rust.
Inspecting and Adjusting
Inspect the fence for any gaps or uneven areas. Make adjustments as necessary to ensure your fence is secure and visually appealing. Check that all panels are firmly attached and that the fence line is consistent.
Tidying the Workspace
Once you're satisfied with your fence, clean up your work area. Remove any leftover materials or debris to leave your yard looking neat and tidy. Proper cleanup will not only improve the appearance of your space but also prevent any potential hazards.
Enhancing with Landscaping
Consider adding landscaping elements around your fence to enhance its appearance. Shrubs, flowers, or decorative stones can complement the fence and integrate it into your yard's design.
Maintenance Tips
To keep your fence looking its best and ensure it lasts for years to come, follow these maintenance tips. Regular upkeep will protect your investment and maintain the beauty and functionality of your fence.
Conducting Regular Inspections
Periodically inspect your fence for any signs of damage or wear. Look for loose panels, rot, or rust, and address any issues promptly. Early detection and repair can prevent more significant problems down the line.
Maintaining Cleanliness
Clean your fence regularly to prevent the buildup of dirt and grime. For wooden fences, a simple wash with water and mild detergent will suffice. For metal or vinyl fences, a power wash may be more effective. Keeping your fence clean will enhance its appearance and longevity.
Controlling Vegetation Growth
Ensure that plants and vines do not grow against your fence, as they can cause damage over time. Trim back any vegetation that comes into contact with the fence. Regular maintenance of surrounding plants will prevent structural damage and maintain the integrity of your fence.
Seasonal Care and Adjustments
Consider seasonal maintenance, such as applying additional protective treatments before winter or checking for damage after storms. Adapting your maintenance routine to the seasons will help your fence withstand various weather conditions.
Conclusion : How to Install Fence Panels
Installing fence panels is a rewarding DIY project that can enhance the appearance and functionality of your outdoor space. By following this comprehensive guide, you'll be equipped with the knowledge and confidence to install your own fence panels, creating a beautiful and functional addition to your property.
Remember to take your time, follow each step carefully, and enjoy the process of transforming your yard with your new fence. With proper installation and regular maintenance, your fence will provide privacy, security, and aesthetic value for years to come. Happy fencing!


Comments