Unlock the Secrets to Saving Your Oil Paints:
- DreamDen AI Editorial Team
- Sep 19, 2025
- 15 min read

Understanding Oil Paint Drying and Degradation
The Science Behind Oil Paint Dry Time
Oil paint drying isn’t a simple process; it’s a complex chemical reaction involving oxidation and polymerization. The drying oil, typically linseed, poppy, or safflower, contains unsaturated fatty acids. Exposure to oxygen causes these acids to react, forming cross-linked polymer chains. This process, significantly influenced by the pigment used, is what transforms the liquid paint into a solid film. In our experience, thicker paint layers take considerably longer to dry due to limited oxygen access to the inner layers. A common mistake we see is assuming all oil paints dry at the same rate—this is far from true.
Several factors dramatically affect drying time. Temperature plays a crucial role; warmer temperatures accelerate oxidation. High humidity can slow the process, as excess moisture competes with oxygen. The pigment itself also impacts drying time; some pigments, like titanium white, can act as catalysts, speeding up the process, while others might slow it down. Finally, the type and amount of medium used—such as alkyd mediums which accelerate drying or slower drying linseed oil—significantly influences the drying rate. Understanding these variables is key to predicting and managing your oil paint’s drying time and preventing issues like cracking or wrinkling in the final painting.
Factors Affecting Oil Paint Longevity (Temperature, Pigments)
Temperature significantly impacts oil paint drying time and longevity. Higher temperatures, particularly above 75°F (24°C), accelerate the oxidation process, potentially leading to cracking or premature aging. In our experience, studios with inconsistent temperatures—fluctuations of more than 10°F (6°C)—show a greater incidence of paint degradation. Conversely, consistently cool temperatures slow drying, extending the workable time but potentially increasing the risk of mold or mildew if humidity is high. Maintaining a stable temperature between 65-75°F (18-24°C) is ideal for optimal paint preservation.
Pigment selection is equally crucial. Certain pigments are inherently more lightfast than others, meaning they resist fading from UV exposure. For example, cadmium pigments are known for their exceptional lightfastness, while some organic pigments, such as alizarin crimson, are prone to fading over time. A common mistake we see is neglecting to research the lightfastness rating of pigments before a project, particularly for paintings intended for long-term display. Consulting a color chart with lightfastness ratings (such as those found in professional paint manufacturer catalogs) is essential for ensuring the longevity of your artwork. Remember, even lightfast pigments can be affected by extended exposure to direct sunlight, highlighting the importance of appropriate storage and display conditions.
Identifying Signs of Drying and Degradation
Recognizing the subtle signs of oil paint drying and degradation is crucial for preserving your artwork. In our experience, the most common indicator is skinning, where a hardened layer forms on the surface of the paint, preventing proper drying from the inside out. This is often accompanied by a noticeable change in color or texture, sometimes becoming duller or cracking. Another key warning sign is yellowing, a natural process accelerated by exposure to UV light and certain pigments. While some yellowing is inevitable, excessive discoloration can signal issues with the paint’s composition or storage conditions.
Furthermore, pay close attention to any unusual brittleness or cracking – these suggest problems with the paint film’s flexibility and adhesion to the canvas.
A common mistake we see is overlooking the impact of improper storage. For example, storing tubes of oil paint horizontally can lead to faster oxidation and skinning. Observing changes in the consistency, such as increased viscosity or separation of pigment and medium (fatty separation), is also a critical sign of degradation. Remember to document the condition of your paintings over time—taking photographs is invaluable for tracking changes. By actively monitoring your paints for these key indicators—skinning, yellowing, cracking, changes in consistency, and brittleness—you can proactively address potential problems and ensure the longevity of your artwork.
Essential Tools & Materials for Proper Storage

Choosing the right Containers (Glass, Metal, Plastic)
Selecting appropriate containers is paramount for preserving the quality and longevity of your oil paints. In our experience, the best choice often depends on the specific paint and your storage environment. Glass containers, while aesthetically pleasing, are susceptible to breakage and can be heavy. However, they are inert and won’t react with the paint, making them an excellent choice for long-term storage, particularly for archival purposes. Avoid using recycled glass, as residues might contaminate your paints.
A common mistake we see is assuming all metal containers are suitable. While some are inert, others can react with the pigments, leading to discoloration or even damaging the paint’s consistency. Tin, for instance, is generally safe for shorter periods, but for long-term storage, we recommend opting for stainless steel. Plastic containers, especially those made from low-density polyethylene (LDPE), are lightweight and relatively inexpensive. However, some pigments might leach into certain plastics, affecting both the paint and container. Always choose food-grade plastics labeled as suitable for oils to mitigate this risk. Ultimately, the ideal container depends on your budget, storage conditions, and the length of time you intend to store your paints.
Using Appropriate Sealants and Wraps
Protecting your oil paints from the damaging effects of air and moisture is crucial for maintaining their vibrancy and workability. In our experience, simply placing a lid on a paint tube isn’t sufficient for long-term storage. A common mistake we see is neglecting the use of airtight seals after each painting session. Consider using silicone-based sealant around the tube’s opening to create a truly hermetic seal, preventing oxidation and skin formation. For opened tubes, we recommend using flexible, airtight plastic wrap like Saran Wrap, followed by a resealable plastic bag, creating a double barrier against air and moisture. This multi-layered approach is especially vital for pigments prone to drying out quickly.
Beyond tubes, palette knives are key to proper sealing. Instead of leaving excess paint exposed on a palette, scrape it back into its container. Then, using a palette knife, smooth the surface to eliminate air pockets, ensuring a tight seal. For stored palettes, consider covering them with cling film or a damp cloth (changed frequently) to prevent drying. Remember, even small amounts of air exposure can drastically reduce the lifespan of your oil paints. This careful attention to detail not only extends the usability of your paints but also safeguards your investment.
Importance of Cleanliness and Organization
Cleanliness is paramount in preserving the longevity and vibrancy of your oil paints. A common mistake we see is neglecting palette and brush cleaning. Residual paint, especially when allowed to dry, can contaminate future mixes, altering colors and consistency. In our experience, thoroughly cleaning palettes with odorless mineral spirits after each session, followed by a gentle soap and water rinse, is essential. Similarly, meticulously cleaning brushes—working from the ferrule outwards—with appropriate solvents prevents hardened paint from damaging bristles and shortening their lifespan.
Organization is equally crucial for efficient workflow and paint preservation. A poorly organized studio leads to wasted time searching for colors and increases the risk of accidental spills or damage. Consider implementing a system that categorizes your paints by color family or hue. Clearly labeling tubes with both color name and date of opening helps track freshness. Furthermore, storing paints in a cool, dark, and dry environment, away from direct sunlight and extreme temperature fluctuations, significantly extends their shelf life. This simple preventative maintenance can save you considerable time, frustration, and ultimately, money in the long run.
The ultimate guide to Storing Oil Paints: Techniques and Methods
Storing Open Tubes of Oil Paint
Properly storing open tubes of oil paint is crucial for maintaining their quality and longevity. A common mistake we see is neglecting to adequately seal the tube after each use. In our experience, even a small amount of air exposure can lead to significant paint oxidation and skin formation, affecting both the color and consistency. To prevent this, always ensure the paint is squeezed back down to minimize air space within the tube. Then, firmly crimp the tube’s cap to create an airtight seal.
Consider using a palette knife to thoroughly clean the paint from the opening before resealing, preventing dried paint from accumulating and compromising the seal. Alternatively, some artists employ specialized tube sealers or even wrap the cap with parafilm for an extra layer of protection against air and moisture. While storing tubes upright is generally recommended to prevent pigment settling, for paints that exhibit significant separation, gentle mixing before each use is necessary. Remember, diligent attention to these details will significantly extend the usable lifespan of your valuable oil paints.
Storing Palette Knives and Scrapers
Proper storage of your palette knives and scrapers is crucial to maintaining their longevity and preventing damage to both the tools and your paints. In our experience, neglecting this often leads to dull blades and even accidental injury. A common mistake we see is simply tossing them into a drawer with other supplies, resulting in scratched blades and potential paint contamination. Instead, consider dedicated storage solutions. A magnetic strip affixed to a wall or the inside of a cabinet provides easy access and keeps blades protected from contact. Alternatively, a sturdy, padded case designed for knives or tools offers excellent protection during transport or longer-term storage.
For high-quality, handcrafted palette knives, investing in individual sheaths or protective sleeves is a worthwhile investment. This ensures each blade remains sharp and free from accidental damage. Remember to thoroughly clean your palette knives and scrapers after each use, removing all residual paint with a solvent like mineral spirits and then wiping them dry. Allowing paint to dry on the blades will not only dull them but can also cause corrosion, impacting performance and lifespan. This meticulous cleaning, coupled with careful storage, will significantly extend the life of your valuable tools.
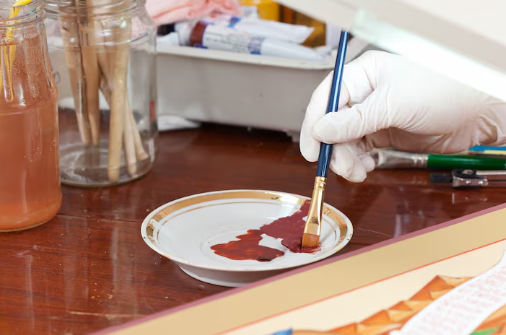
Storing Mixed Colors on Palettes
Preserving mixed oil colors on palettes requires a multi-pronged approach. A common mistake we see is simply leaving a palette uncovered, allowing the paint to dry out completely and become unusable. In our experience, the best method involves a combination of palette protection and proper storage. Immediately after finishing a painting session, cover your palette with palette paper or plastic wrap to seal in moisture and prevent oxidation. This simple step significantly extends the lifespan of your meticulously mixed hues. Avoid using cling film as it can sometimes adhere to the paint, risking damage when you attempt to remove it.
For longer-term storage, consider using a palette knife to transfer your mixed colors to airtight containers. Small, sealable containers work ideally, allowing you to label each color for easy identification later. Remember that even with proper preservation, mixed colors will eventually change subtly over time; oils react and shift, altering hues ever so slightly. Properly storing mixed colors is crucial. It not only saves you money on pigments, but also allows you to maintain consistency if you work on a painting across several sessions. Regularly checking your stored mixtures, noting any shifts in color, is an essential part of the long-term preservation strategy.
Long-Term Storage for Extended Projects
Embarking on a large-scale oil painting project often means pausing the work for extended periods. In our experience, the key to preserving your paints during these hiatuses lies in meticulous preparation and airtight containers. A common mistake we see is simply leaving tubes loosely capped. This allows for significant air exposure, leading to skin formation, paint drying, and eventual hardening. Instead, prioritize airtight storage; consider using resealable, freezer-safe bags to further minimize oxygen exposure within the tubes themselves, squeezing out excess air before sealing. For opened paints, small, airtight containers with lids are ideal.
For truly long-term storage—think years, not months—consider temperature control. While not always feasible, a cool, dark, and consistently temperature-controlled environment significantly slows down the oxidation process. Many professional artists swear by storing their palettes and paints in a temperature-controlled storage unit for major projects. This approach minimizes the risk of extreme temperature fluctuations that can damage the paints, especially crucial for older or delicate colors. Remember to clearly label all your containers with contents and dates to facilitate easy identification and rotation of older paints. This proactive approach ensures your investment in high-quality materials lasts the duration of your project, regardless of how long that may be.
Reviving Dried-Out Oil Paints: Effective Strategies

Adding Mediums and Oils to Soften Dried Paint
Adding a medium or oil to dried oil paint can be a successful way to restore its workability, but it requires a delicate touch and careful selection. In our experience, the key is patience and incremental additions. A common mistake we see is adding too much at once, resulting in a paint that’s too thin and loses its body. Start by adding a tiny amount of linseed oil—a classic choice for its compatibility with oil paints—directly to the dried paint. Gently mix, using a palette knife or a clean brush, and observe the consistency. If it’s still too stiff, add more oil drop by drop, mixing thoroughly between additions.
Different mediums offer varying degrees of rejuvenation. Liquin or other alkyd-based mediums, for example, can significantly increase the flow and reduce the drying time, but they might alter the final appearance and texture of the paint. Conversely, using stand oil will impart a glossy finish and increased flexibility but will take longer to dry. Remember, the type of medium employed heavily influences the final outcome, affecting the gloss, drying time, and even the color vibrancy slightly. Always test on a small, inconspicuous area first before applying it to your artwork. Carefully consider the properties of your chosen medium and its impact on your painting before proceeding.
Testing Paint Consistency Before Use
Before attempting to revive dried oil paints, a crucial first step is rigorously assessing their consistency. A common mistake we see is artists jumping straight to restoration techniques without fully understanding the extent of the paint’s hardening. In our experience, this often leads to wasted effort and potentially damaged artwork. Instead, begin by carefully examining the tube or container. Is the paint merely slightly thickened, or is it rock-hard? The degree of hardening dictates the appropriate revival method.
To perform a proper consistency check, carefully squeeze a small amount of paint onto a palette. Observe its texture: is it still pliable, or is it stiff and brittle? Try to mix it with a medium such as linseed oil or a paint rejuvenator. Note how it reacts—does it soften readily, or does it require significant effort and remain stubbornly thick? If it crumbles or remains stubbornly inflexible after adding medium, it’s likely beyond simple revival and may need more intensive methods or should be discarded. Remember, the goal isn’t just to make it usable, but to ensure the paint retains its original properties and working qualities for optimal results.
Methods for Reviving Different Paint Types
Reviving oil paints depends heavily on the type of paint and the extent of drying. In our experience, student-grade paints, with their higher proportion of fillers, are more susceptible to irreversible drying than artist-grade paints, which possess a higher pigment-to-binder ratio. A common mistake we see is treating all dried paints the same. For example, a completely hardened student-grade titanium white might be beyond salvage, while a slightly thickened artist-grade cadmium yellow might respond well to careful rejuvenation.
For slightly thickened artist-grade paints, a small amount of odorless mineral spirits added gradually, with thorough mixing, is usually effective. However, for paints with a significant amount of drying, a more aggressive approach might be necessary. We’ve found success using a combination of linseed oil and a touch of turpentine, carefully applied and mixed. The key is patience and gentle re-integration. Always test your chosen method on a small, unimportant portion of the paint before committing to the entire tube or container. Remember to work in a well-ventilated area, as solvents can be harmful if inhaled. Improper revival techniques can damage the paint’s integrity, resulting in cracking or altered consistency, so caution is vital.
When to Discard Dried-Out Oil Paint
Knowing when to let go of hardened oil paint is crucial for maintaining a clean and efficient studio. In our experience, the decision isn’t always straightforward. A common mistake we see is clinging to paint tubes that are beyond revitalization, unnecessarily cluttering workspace and fostering unrealistic hopes of recovery. While some techniques can restore slightly thickened paints, completely dried-out tubes are rarely salvageable. Consider the paint’s texture; if it’s rock-hard and requires significant force to even dent, discarding it is likely the best course of action. Trying to force the hardened paint will only likely lead to frustration and potential damage to your tools.
Several factors determine if revival is even possible. Firstly, the age of the paint plays a significant role. Oil paints left unused for several years, especially those exposed to extreme temperatures or humidity, are significantly less likely to respond to reviving techniques. Secondly, consider the pigment type. Some pigments are inherently more prone to drying out than others. If the paint exhibits severe cracking or shows obvious signs of separation, it’s a clear indicator of irreversible deterioration. Ultimately, the cost-benefit analysis should guide your decision. The time and effort spent attempting to revive a severely hardened paint, weighed against the cost of a fresh tube, often points towards discarding the old. Prioritize quality materials and workspace efficiency—a decluttered space is a productive space.
Avoiding common mistakes: How to Prevent Oil Paint Issues
Mistakes to Avoid When Storing Oil Paints
A common mistake we see is improper temperature control. Extreme temperatures, whether excessively hot or freezing cold, can drastically affect the consistency and longevity of your oil paints. In our experience, fluctuating temperatures lead to cracking and separation of pigments, rendering your paints unusable. Ideally, store your paints in a cool, dry place with a consistent temperature between 60-75°F (15-24°C). Avoid direct sunlight, as UV rays can also degrade the paint’s quality over time.
Another frequent error is neglecting proper tube closure and container sealing. Leaving even a small amount of air exposure can lead to skin formation – a hardened layer on the surface of the paint that is difficult to remove and may affect the paint’s workability. Always ensure tubes are tightly capped and, if using open containers, use airtight lids or covers such as silicone seals. For larger quantities of paint stored in containers, we recommend layering the surface with a thin layer of paraffin wax or similar material to create an oxygen barrier. This simple step dramatically extends the shelf-life and maintains the paint’s original creamy consistency.
Identifying and Preventing Common Problems
In our experience, the most common oil paint problems stem from improper storage and handling. A frequent mistake we see is neglecting temperature control. Extreme heat can cause the oil to separate and the paint to become thick and unusable, while freezing temperatures can damage the pigment and binder, leading to cracking or crumbling. Ideally, store your paints in a cool, dry place with consistent temperatures, between 60-75°F (15-24°C). Avoid direct sunlight, as UV rays can degrade the paint’s color over time.
Beyond temperature, moisture is another significant culprit. Even slight humidity fluctuations can cause mold or mildew growth, ruining your valuable paints. Always ensure your paints are stored in airtight containers, preferably with a desiccant packet to absorb excess moisture. For opened tubes, meticulously wipe the rim clean before resealing to prevent skin oils or dust from contaminating the paint. We’ve found that a dedicated, well-ventilated paint storage area—away from sources of dampness like basements—is crucial for long-term preservation. Remember, preventative care significantly reduces the risk of costly paint loss.
Tips for Maintaining Oil Paint Quality
Proper storage is paramount to maintaining the workability and longevity of your oil paints. In our experience, neglecting this leads to significant issues, from hardened tubes to compromised pigment vibrancy. A common mistake we see is storing paints in fluctuating temperatures, causing the oil to separate or the pigments to settle unevenly. Always keep your paints in a cool, dry place, ideally between 60-75°F (15-24°C), away from direct sunlight which can accelerate the oxidation process.
Furthermore, consider the tube’s condition. Damaged tubes expose the paint to air, leading to rapid drying and skin formation. We recommend carefully inspecting tubes before and after each use, and ensuring that the caps are tightly sealed. Remember, even the best quality paints degrade over time. Implementing a First-In, First-Out (FIFO) system for your paints ensures you’re using older tubes before they become unusable. Regularly check your paint collection for any signs of deterioration like cracking or hardening, promptly discarding any compromised tubes. This proactive approach will help ensure your oil paints remain vibrant and usable for years to come.
Expert Tips, Professional Advice, and Frequently Asked Questions

Expert Advice from Professional Artists
In our experience, the most common mistake emerging artists make is neglecting proper oil paint storage. Many believe simply capping tubes is sufficient, but this often leads to premature drying and paint wastage. We’ve seen firsthand the frustration of artists losing valuable pigments due to inadequate preservation. A key element often overlooked is the importance of temperature and humidity control. Extreme temperatures can cause cracking and separation, while high humidity promotes mold growth. Consider investing in an airtight container with a desiccant pack to regulate moisture levels.
Professional artists often employ a multifaceted approach. Some prefer storing paints in a cool, dark place, away from direct sunlight which can degrade pigments. Others use a dedicated paint storage cabinet with adjustable shelving to maximize space and optimize organization for easy access. A helpful tip we share with our students is to label tubes clearly with purchase dates for First-In, First-Out (FIFO) inventory management. This simple technique helps ensure that older paints are used before they dry out, minimizing waste and maximizing the lifespan of your valuable oil paints. Remember, proper storage significantly extends the usability of your paints, resulting in considerable cost savings in the long run.
Addressing Common Concerns and Misconceptions
A common misconception is that all oil paints require the same storage conditions. In our experience, this couldn’t be further from the truth. Highly pigmented paints, for instance, are more susceptible to settling and skinning than those with lower pigment concentration. Ignoring this can lead to wasted paint and frustrating cleanup. Remember to regularly stir your paints, especially those known for rapid settling, to maintain a consistent consistency.
Another area where misconceptions abound is the use of mediums and solvents. Many believe that adding excessive linseed oil will improve the paint’s longevity. While a small amount can enhance flow, an overabundance can lead to slower drying times, increasing the risk of cracking and yellowing over time. Conversely, a common mistake we see is the improper cleaning of brushes and palettes with harsh, incompatible solvents. This can damage the paint’s structure and alter its chemical composition. Always refer to your specific paint manufacturer’s recommendations for cleaning and storage. Following these guidelines will significantly extend the usable lifespan of your oil paints.
A Comprehensive FAQ Section Covering All Your Questions
Q: How long can oil paints truly last? A: In our experience, properly stored oil paints can last for decades, even exceeding 50 years. However, this depends heavily on pigment type and storage conditions. A common mistake we see is assuming all paints age identically. For instance, cadmium pigments tend to retain their vibrancy longer than certain earth tones which might become duller over time.
Q: What’s the best way to store my oil paints? A: Maintaining a cool, dark, and dry environment is crucial. Extreme temperature fluctuations or direct sunlight can significantly impact the paint’s lifespan. Avoid storing tubes on their caps, as this can cause the paint to separate. We recommend standing tubes upright in a drawer or on a shelf, or using a paint organizer for better access and protection. Also, remember to always seal tubes tightly after use to prevent oxidation and skin formation. Using an airtight container for your palette further protects your already-mixed colors from drying out or spoiling. Proper storage is the most important aspect of extending the lifespan of your oil paints.


Comments