How to Make a Wood Fence Gate
- DreamDen AI Editorial Team
- May 23, 2025
- 6 min read

Updated: Jul 2, 2025

Building a wood fence gate can be a rewarding DIY project, providing both functionality and aesthetic appeal to your outdoor space. Whether you're aiming to enhance your home's curb appeal or simply need a new gate to complete your fence, this guide will walk you through the steps of constructing a durable and attractive wood fence gate.
Planning Your Wood Fence Gate

Before you start cutting and assembling, it's essential to have a well-thought-out plan. Here are some key factors to consider:
Determine the Purpose and Location
First, decide where your gate will be located and its primary purpose. Is it meant for pedestrian access, or will it need to accommodate vehicles? Understanding the purpose will help you determine the size and design of the gate. Consider how often it will be used and by whom, as this could affect the materials and strength needed. Also, think about the surrounding landscape and how the gate will fit within it, both in terms of function and aesthetics.
Evaluate Environmental Factors
The location of your gate will influence its durability. Consider the climate and weather conditions in your area, as these will impact the materials and finishes you choose. If you live in a region with high rainfall or humidity, opt for materials that resist rot and moisture. Additionally, pay attention to sun exposure, as UV rays can fade and damage the wood over time, necessitating additional protective measures.
Choose the Right Materials
Selecting high-quality materials is crucial for building a sturdy gate. Cedar and redwood are popular choices for their durability and resistance to rot and insects. Pressure-treated lumber is also a good option for posts, as it withstands ground contact. Evaluate the pros and cons of each material in terms of cost, availability, and maintenance needs. Don't forget to consider the hardware, such as hinges and latches, which should be robust and resistant to rust and corrosion.
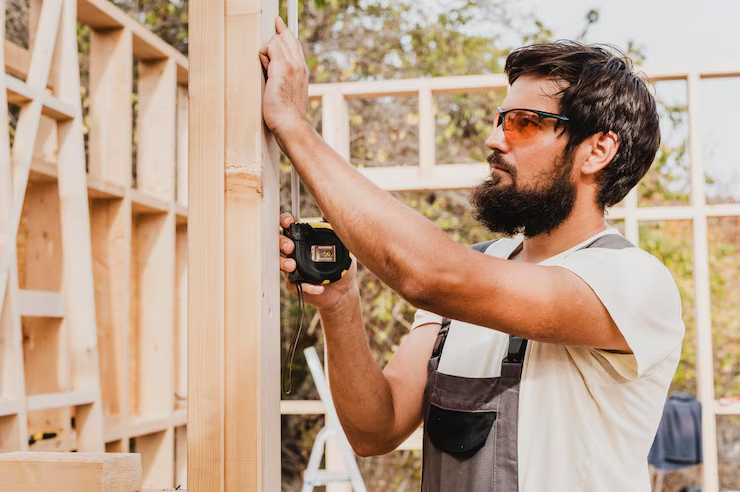
Measure and Plan the Design
Measure the opening where the gate will be installed. A standard single gate is usually about 3 to 4 feet wide, but it can vary based on your needs. Sketch a design that complements your fence style and consider incorporating decorative elements like latticework or a curved top. Think about symmetry and how the gate will align with existing structures. Additionally, visualize how the gate will look from both sides, ensuring it’s aesthetically pleasing from every angle.
Factor in Local Regulations and Permits
Before starting your project, check with local authorities to ensure compliance with any regulations or permits required for building a fence gate. Some areas have specific guidelines regarding height, materials, and proximity to property lines. Being informed about these requirements will help you avoid potential legal issues and ensure your gate meets community standards.
Gathering Your Tools and Materials

Once you've planned your design, gather all the necessary tools and materials. Here's a checklist to get you started:
Essential Tools Checklist
Measuring tape
Circular saw or hand saw
Drill and drill bits
Hammer
Level
Carpenter's square
Having the right tools on hand is crucial for efficiency and accuracy. Ensure your tools are in good working order and consider renting or borrowing any specialty tools you might not own. Organize your workspace to keep tools accessible and prevent interruptions during the building process.
Necessary Hardware and Fasteners
Hinges and latch
Wood screws and nails
Choosing the right hardware and fasteners is vital for the gate’s longevity and functionality. Consider the gate's weight and choose hinges that can support it adequately. Stainless steel or galvanized screws and nails are excellent choices for outdoor projects, as they resist rust and corrosion.
Finishing Supplies and Safety Gear
Sandpaper or a power sander
Wood stain or paint (optional)
Safety gear (gloves, goggles)
Safety should be a priority when working with tools and materials. Equip yourself with protective gear to prevent accidents. If you plan to stain or paint your gate, select a finish that provides both protection and aesthetic value, enhancing the wood's natural beauty while shielding it from the elements.
Constructing the Wood Fence Gate

Building the Gate Frame
Cut the Frame Pieces: Using your measurements, cut the top, bottom, and side pieces for the gate frame. The top and bottom rails should fit snugly between the side pieces. Precision in cutting is crucial, as inaccuracies can lead to misalignment and structural weakness.
Assemble the Frame: Arrange the pieces on a flat surface to form a rectangle. Use the carpenter's square to ensure right angles and secure them with wood screws. Double-check measurements and alignment before fastening, as this will set the foundation for a sturdy gate.
Add Diagonal Bracing: For added strength, install a diagonal brace from the bottom corner of the hinge side to the top corner of the latch side. This will prevent the gate from sagging over time. The brace should be tightly secured and fit perfectly within the frame for optimal support.
Attaching the Fence Boards
Prepare the Boards: Cut the fence boards to the desired height of the gate. Sand the edges to smooth out any rough spots. This step ensures a clean, professional appearance and reduces the risk of splinters or injuries.
Attach the Boards: Starting from one side, attach the boards to the frame using screws or nails, spacing them evenly apart. Use a level to keep them aligned. Consistent spacing not only enhances aesthetics but also ensures structural balance.
Trim Excess Board Lengths: Once all boards are attached, trim any excess from the top to ensure a uniform height. A uniform top edge adds to the gate's visual appeal and helps maintain symmetry with the surrounding fence.
Installing Hinges and Latch
Attach Hinges to the Gate: Position the hinges on the gate's frame, about 8 inches from the top and bottom. Secure them with screws, ensuring they are aligned for smooth operation. Proper alignment is critical to prevent binding or uneven swinging.
Mount the Gate: With a helper, hold the gate in place and attach the other side of the hinges to the fence post. Use a level to check that the gate hangs straight. This step may require adjustments to ensure the gate swings freely without obstruction.
Install the Latch: Finally, attach the latch to the gate and the corresponding catch on the opposite post, ensuring it closes securely. Test the latch several times to confirm it functions smoothly and provides a secure closure.
Once your wood fence gate is installed, regular maintenance is key to ensuring its longevity and functionality. Over time, you may encounter issues such as sagging or misalignment, which can be addressed with simple adjustments or repairs. However, if your gate includes electronic components, it might require specialized attention. For residents in the area, a reliable Salem OR electric gate repair service can provide expert assistance in maintaining and repairing your gate's electronic systems, ensuring smooth operation and enhanced security. Whether it's a manual or electric gate, keeping it in top condition will enhance the overall appeal and security of your property.
Finishing Touches
Sanding and Finishing
Once your gate is constructed, sand down any rough edges and surface imperfections. This not only enhances the gate's appearance but also prepares it for finishing. A smooth surface is essential for even application of stains or paint and reduces the risk of weather damage.
Staining or Painting
Apply a wood stain or exterior paint to protect the gate from the elements. Choose a finish that complements your fence and enhances the wood's natural beauty. Allow the finish to dry completely before using the gate. Multiple coats may be needed for full protection, so plan for adequate drying time between applications.
Adding Decorative Elements
Consider adding decorative elements to personalize your gate, such as ornamental hardware, carvings, or a nameplate. These touches can enhance the gate's aesthetic appeal and reflect your personal style. Ensure any additions are weatherproof and securely attached to withstand outdoor conditions.
Maintenance Tips for Longevity
To keep your wood fence gate looking its best and functioning well, regular maintenance is key. Here are some tips:
Regular Inspections
Inspect your gate regularly for signs of wear or damage. Check for loose screws or nails, and tighten them as needed. Early detection of issues can prevent more significant problems down the line, saving time and repair costs.
Hinge and Latch Care
Lubricate hinges to ensure smooth operation and prevent rust. Regular maintenance of moving parts extends their lifespan and keeps the gate operating smoothly. Use a weather-resistant lubricant for best results.
Reapplying Finishes
Touch up paint or stain as needed to protect the wood and maintain its appearance. Reapply the finish every few years to combat the effects of weather and UV exposure. This not only preserves the gate's beauty but also prolongs its structural integrity.
Area Maintenance
Clear debris around the gate to prevent moisture buildup. Leaves and dirt can trap moisture, leading to rot and decay. Keep the ground clear and ensure proper drainage around the gate area to maintain its condition.
Conclusion
Building a wood fence gate is a manageable project that can add both beauty and functionality to your home. By following this guide, you'll create a gate that not only stands the test of time but also enhances your outdoor space. With careful planning, quality materials, and a bit of elbow grease, your new gate will be a feature you can be proud of.
Remember, the key to a successful gate project lies in the details. Measure twice, cut once, and don't rush the finishing touches. Your patience and precision will pay off with a wooden gate that serves you well for years to come. Celebrate your achievement and enjoy the added charm and utility your new gate brings to your property.


Comments