Water Dripping from Your AC Vent?
- DreamDen AI Editorial Team
- Aug 25, 2025
- 18 min read

Updated: Oct 23, 2025

Water dripping from your AC vent typically indicates an issue with your cooling system's moisture control. The most common cause is a blocked condensate drain line, which hinders proper drainage of condensation. This can also occur if the air filter is dirty, resulting in the evaporator coil freezing and then thawing, which leads to excess water. Other potential causes include inadequate duct insulation, a cracked or rusted drain pan, low refrigerant levels, or unusually high indoor humidity. To address the problem, begin by replacing the air filter and checking for drain blockages. If the issue continues, contact an HVAC technician to examine for refrigerant leaks or condensate pump malfunctions.
Understanding AC Drainage Systems: Why Water is Normal (and When it’s Not)
The Role of Condensation in Air Conditioning
Air conditioning systems work by removing heat and humidity from the air. This process involves cooling refrigerant, which causes moisture in the air to condense. This condensation is completely normal and is why you see water dripping from your AC unit; it’s the byproduct of a properly functioning system.
The amount of condensation depends on factors like humidity levels and the system’s cooling capacity. Higher humidity means more moisture in the air, leading to more condensation. A larger or more efficient AC unit will remove more moisture, potentially resulting in increased water drainage. “Understanding this basic principle is crucial to diagnosing problems with your AC’s drainage system.” Regular maintenance, including cleaning the condenser coils and evaporator coil, helps maintain optimal efficiency and reduce excessive condensation.
However, excessive water dripping from your AC vent can signify issues. Problems with your drainage system, such as a clogged drain line or a malfunctioning condensate pump, can cause water to overflow. Similarly, a refrigerant leak can also increase condensation beyond normal levels. These situations necessitate professional attention to prevent damage to your home and system. Ignoring these issues can lead to serious problems like mold growth and structural damage.
How the Condensate Drain Works: A Step-by-Step Explanation
Your air conditioner produces condensation as part of its cooling process. This moisture collects on the evaporator coil, a crucial component within your unit. It’s then crucial to understand how this water is properly managed to prevent issues.
The process begins with the condensate drain pan, a small tray located beneath the evaporator coil. The condensate drips into this pan. From there, a drain line, typically PVC pipe, carries the water away from the unit. Gravity plays a vital role; the line should slope downwards consistently to ensure proper drainage. A clogged drain line is a frequent source of water dripping from your AC vent.
Finally, the water exits the unit, usually draining outdoors or into a nearby drain. Improper installation or a damaged drain line can easily disrupt this process. “A properly functioning condensate drain system is essential for preventing water damage and ensuring the efficient operation of your air conditioning unit.” Regular maintenance, including cleaning the drain line, is crucial to avoiding problems.

Troubleshooting Water Dripping from AC Vents: A Step-by-Step Guide

Check the Condensate Drain Line for Clogs
A clogged condensate drain line is a common culprit behind water dripping from your AC vent. This line removes condensation produced during the cooling process. If it becomes blocked, water backs up, leading to leaks. The first step is locating the drain line; it’s usually a small-diameter pipe connected to your air handler or evaporator coil.
Inspect the drain line carefully. Look for visible clogs. These could be anything from dust and debris to algae growth or even mineral deposits that build up over time. A simple visual inspection often reveals the problem. If you spot a clog, try gently flushing it with a mixture of water and white vinegar. This is often sufficient to dislodge minor blockages. “Using a wet/dry vacuum to suck out the clog can also be effective for larger debris.”
If flushing doesn’t resolve the issue, the clog might be further down the line. You may need to access the drain pan directly to clear it more thoroughly. This may involve removing a panel on your air handler. Remember to turn off the power to your AC unit before attempting any such repair. If the clog persists after these steps, or if you’re uncomfortable performing these tasks, it’s crucial to call a qualified HVAC technician for professional assistance. Ignoring a persistent clog can lead to serious damage and mold growth.
Inspect the Condensate Drain Pan for Leaks or Cracks
Locating your air conditioner’s condensate drain pan is the first step. It’s usually a plastic tray beneath the evaporator coil, often easily accessible by removing the access panel on your unit. Once located, carefully examine the pan’s surface. Look for any visible cracks or holes. Even tiny fissures can allow water to escape and drip from your AC vents.
Remember, a properly functioning drain pan is crucial for preventing water damage.
Next, check for blockages in the drain line. Water backing up in the pan due to a clogged drain line is a common cause of leaks. This often manifests as water overflowing the pan. A small flashlight can help you inspect for debris like algae, mold, or even dust bunnies obstructing the drainage. Clean the pan thoroughly. Use a mild detergent and water solution, ensuring complete rinsing and thorough drying before reinstalling it. “Ignoring a clogged drain line can lead to serious problems, including mold growth and potential damage to your HVAC system.”
Finally, assess the pan’s structural integrity. Is it warped or damaged in any way? A damaged drain pan is beyond simple cleaning. It needs replacing. Attempting repairs on a severely damaged pan is generally not recommended. Improper repair can lead to further leakage and more costly damage later. Replacing a cracked or severely damaged condensate drain pan is a relatively straightforward DIY project, but if you’re uncomfortable, calling a qualified HVAC technician is always the best option.
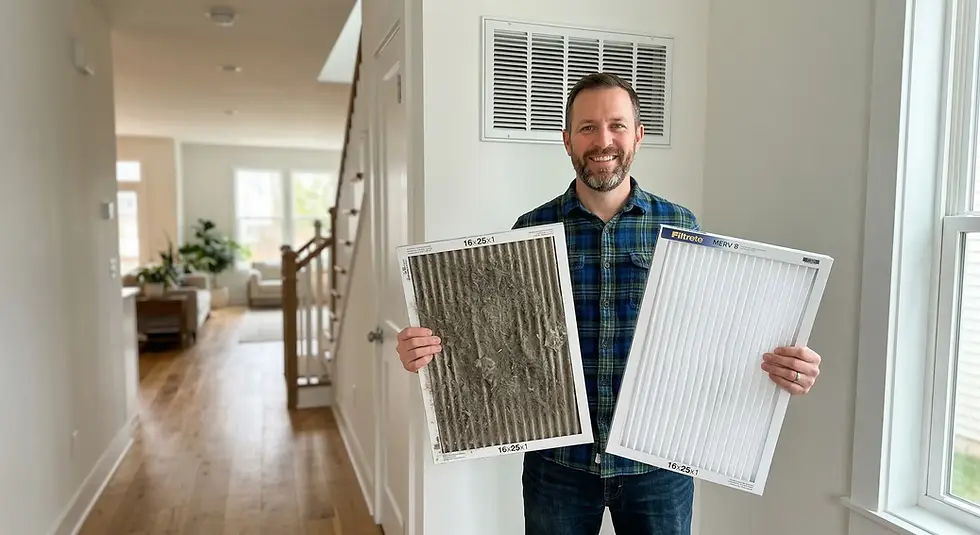
Examine the AC Unit's Air Filter
A clogged or dirty air filter is a common culprit behind AC unit water leaks. The filter restricts airflow, causing the evaporator coil to become excessively cold. This cold coil then leads to condensation buildup, which can eventually drip from your vents. Regular filter changes are crucial for preventing this issue. Most manufacturers recommend replacing filters every 1-3 months, depending on usage and household factors. Check your specific unit’s manual for recommendations.
To examine your air filter, locate it within the air handler unit, usually accessible by opening a panel. Carefully remove the filter and inspect it. Look for visible dirt, dust, pet hair, or other debris. A severely clogged filter will be noticeably restricted, making it difficult to even bend. If it looks dirty or clogged, replace it immediately with a new, correctly sized filter. “Using the wrong size filter can exacerbate the problem, leading to inefficient airflow and increased moisture.”
If replacing the filter doesn’t resolve the dripping issue, the problem likely lies elsewhere in the system. However, a clean filter is the foundation of efficient AC operation. It improves airflow, reduces strain on the system, and prevents many common problems, including excess condensation and water leaks. This simple step can often save you a costly repair call and improve your unit’s lifespan significantly. Remember to always consult your owner’s manual for your specific AC unit model.
Common Causes of AC Leaks and Their Solutions
Clogged Condensate Drain Line: Cleaning and Maintenance
A clogged condensate drain line is a very common culprit behind water dripping from your AC vent. Condensation is a natural byproduct of air conditioning. The drain line carries this water away. When debris like algae, mold, or mineral deposits build up, it restricts water flow, leading to leaks. This is easily preventable with regular maintenance.
Cleaning a clogged condensate drain line is often a simple DIY task. First, locate the drain line—usually a PVC pipe connected to your AC unit. Then, gently flush the line with a mixture of water and a drain cleaner designed for HVAC systems. Avoid harsh chemicals that could damage the line or your unit. You can also use a wet/dry vacuum to remove standing water and debris from the line. Regular flushing, ideally every 3-6 months, is crucial for prevention.
“For persistent clogs, you may need a specialized drain snake or even professional help.” If you’re uncomfortable performing this task yourself, or if flushing doesn’t resolve the issue, contact a qualified HVAC technician. They possess the tools and expertise to clear severe blockages and identify any underlying problems. Remember, neglecting a clogged drain line can lead to more serious issues, including mold growth and system damage. Preventing clogs through routine maintenance saves you time, money, and potential health hazards.
Frozen Evaporator Coil: Identifying and Thawing
A frozen evaporator coil is a common culprit behind AC leaks. Ice forms when the coil isn’t adequately absorbing heat from the air, often due to restricted airflow. This restriction can stem from a dirty air filter, clogged drain line, or restricted airflow through the vents. A visual inspection of the air filter and vents is the first step. If the filter is clogged, replace it immediately.
If the filter is clean, the problem likely lies within the system itself. Low refrigerant levels are a frequent cause, leading to inadequate heat absorption and subsequent freezing. You’ll need a qualified HVAC technician to recharge the system. Never attempt to recharge refrigerant yourself, as improper handling can be dangerous and void warranties. Furthermore, look closely at the evaporator coil itself. Accumulated dust and debris can also significantly hamper its ability to function correctly.
To thaw a frozen evaporator coil safely, turn off your AC unit completely. Allow the system to sit and naturally thaw for several hours, or even overnight. A fan aimed at the unit can help expedite the process. Once thawed, inspect the drain line for clogs. A clogged drain line will prevent condensation from draining properly, leading to repeat freezing. Cleaning the drain line or calling an HVAC professional for assistance is crucial to prevent future issues. “Regular maintenance, including annual professional inspections and filter changes, is key to preventing evaporator coil freeze-ups and subsequent water leaks.”
Leaking Condensate Drain Pan: Repair or Replacement
A leaking condensate drain pan is a common culprit behind water dripping from your AC vent. These pans collect condensation naturally produced by your air conditioner. If the pan cracks, rusts, or becomes clogged, water overflows, leading to leaks. Inspect your pan for damage. Look for cracks, holes, or rust. A simple repair might suffice if the damage is minor. You could use a sealant designed for metal and high temperatures. However, if the pan is significantly damaged or heavily corroded, replacement is the best solution.
Repairing a slightly damaged condensate drain pan is often a cost-effective solution. For minor cracks or holes, a high-quality sealant, such as epoxy designed for metal, can provide a durable repair. Ensure the pan is clean and dry before applying the sealant. Follow the manufacturer’s instructions carefully for optimal results. Remember to test the repair thoroughly after it has fully cured. “A poorly executed repair can lead to further damage and more significant problems down the line.”
Replacing a severely damaged drain pan is a straightforward process for homeowners with some DIY experience. You can find replacement pans at most home improvement stores. Be sure to get one that matches the dimensions of your existing pan. Remember to always disconnect the power to your AC unit before undertaking any repairs. When installing a new pan, ensure it’s properly seated and secured to prevent future leaks. “Always consult a qualified HVAC technician if you’re uncomfortable performing repairs yourself.”
Condensation Pump Failure: Signs and Troubleshooting
A malfunctioning condensation pump is a common culprit behind AC leaks. This pump removes condensate, the byproduct of cooled air, from your air conditioner. When it fails, water backs up and can overflow, leading to dripping from your vents. Look for signs like standing water around your AC unit’s base or a consistently damp area near the unit, indicating the pump is struggling to keep up.
Troubleshooting a faulty condensation pump often involves a visual inspection. Check for clogs in the pump’s drain line. Debris, algae, or mineral buildup can easily impede the pump’s function. A simple cleaning might resolve the issue. You can try flushing the line with a mixture of water and a gentle cleaning solution, like white vinegar. Remember to turn off the AC unit before any maintenance. If the problem persists after cleaning, the pump itself may be failing and require replacement. “A failing pump often makes a noticeable humming or gurgling sound as it struggles to operate.”
If a simple cleaning doesn’t resolve the water dripping from your AC vent, the next step is to check the pump’s power supply. Ensure the pump is properly connected and receiving power. Testing the pump’s electrical components will require some electrical knowledge or the assistance of a qualified HVAC technician. “If you are uncomfortable working with electricity, always call a professional.” Replacing a faulty condensation pump is usually straightforward but requires basic DIY skills or professional help to guarantee correct installation and avoid further damage to your system.
When to Call a Professional HVAC Technician

Signs of Serious Issues Requiring Expert Help
Water dripping from your AC vent is often a minor inconvenience. However, some situations demand immediate professional attention. Persistent dripping, despite minor adjustments, is a key indicator. This could signal a more significant problem within your air conditioning system, such as a leaking condensate drain line or a frozen evaporator coil. Ignoring these issues can lead to costly repairs and potential damage to your home.
A musty odor accompanying the dripping water is another serious warning sign. This indicates mold growth, a major health hazard, often flourishing in damp environments created by AC leaks. Mold spores can trigger allergies and respiratory problems. If you smell mildew or a foul odor alongside the dripping, contact a professional HVAC technician immediately for mold remediation and system inspection. “Ignoring a mold problem can have serious health consequences, and addressing it promptly is vital.”
Finally, significant water volume or pooling around your unit points to a major leak that needs an expert’s touch. Large amounts of water suggest a more extensive issue, potentially involving a compromised condensate pump or a critical refrigerant leak. “These are not DIY fixes and can lead to significant damage if left unaddressed, potentially even damaging the compressor.” Professional diagnosis and repair prevent costly and potentially dangerous problems.
Identifying Potential Safety Hazards
Water leaking from your AC vent is never a situation to take lightly. Ignoring the problem can lead to significant issues, some of which pose serious safety risks to you and your family. One major concern is the potential for electrical shock. Standing water near electrical components, like wiring or the air handler itself, creates a dangerous environment. Even a small amount of water can be enough to cause a short circuit, leading to electrical fires or injury.
A second critical safety hazard is the risk of mold and mildew growth. Prolonged exposure to moisture fosters the ideal environment for these harmful organisms. Mold can trigger allergies, asthma attacks, and other respiratory problems. In severe cases, mold infestations can require extensive and costly remediation, impacting your home’s structural integrity. “Remember, addressing water leaks promptly is crucial to prevent costly and dangerous health hazards.”
Finally, consider the potential for structural damage. Persistent water dripping can weaken building materials over time, leading to sagging ceilings, damaged walls, and even foundation problems. These issues are not only expensive to repair, but they can also compromise the overall stability and safety of your home. If you’ve identified any of these potential safety hazards related to your AC vent leak, don’t delay. Contact a qualified HVAC professional immediately for a thorough inspection and repair. “Your safety and the integrity of your home are paramount.”
Understanding the Benefits of Professional AC Maintenance
Regular professional AC maintenance offers significant advantages beyond simply preventing a dripping vent. A qualified HVAC technician possesses the specialized tools and knowledge to identify potential problems early, often before they escalate into costly repairs. This proactive approach can save you money in the long run, avoiding the expense of emergency calls and extensive component replacements. Think of it as preventative medicine for your air conditioner.
Beyond cost savings, professional maintenance ensures optimal system efficiency. A well-maintained AC unit operates at peak performance, consuming less energy and reducing your monthly electricity bill. Studies by the Department of Energy show that regular maintenance can improve efficiency by 15% or more. This translates to significant long-term savings and a smaller carbon footprint. “Regular servicing not only extends the lifespan of your unit but also improves indoor air quality,” which is crucial for your health and comfort.
Finally, professional AC maintenance protects your warranty. Many manufacturers require annual maintenance by a qualified technician to maintain the validity of their warranties. Ignoring this requirement can void your warranty, leaving you responsible for the full cost of repairs or replacements. Therefore, choosing professional maintenance is a smart investment that safeguards your financial investment in your air conditioning system and ensures peace of mind. “By scheduling regular check-ups, you protect your investment and avoid unexpected breakdowns.”
Preventative Maintenance: Keeping Your AC Running Smoothly
Regular AC Filter Changes: Frequency and Best Practices
Clean air filters are crucial for efficient air conditioning. A clogged filter restricts airflow, forcing your AC unit to work harder. This increased strain leads to higher energy bills and can cause premature wear and tear on the system. Regular filter changes are a simple preventative measure with significant long-term benefits.
The frequency of filter changes depends on several factors, including the type of filter, the number of occupants in your home, and the presence of pets. Generally, fiberglass filters should be replaced every 30-60 days, while pleated filters can last 90-180 days. However, always visually inspect your filter monthly. If it appears visibly dirty or clogged, replace it immediately. “Ignoring this simple maintenance task is a leading cause of AC problems, including water leaks.”
Remember to always use the correct filter size for your specific AC unit. Improperly sized filters can impede airflow or even damage the system. When replacing the filter, take the opportunity to thoroughly clean the surrounding area. Dust and debris buildup around the filter can also negatively impact performance. Consider using a vacuum cleaner with a brush attachment to remove accumulated dust and particles. This ensures optimal airflow and helps prevent water leakage from your AC vents.

Tips for Extending the Lifespan of Your AC System
Regular maintenance significantly extends the life of your air conditioning system, saving you money on costly repairs and replacements down the line. Scheduling annual professional inspections is crucial. A qualified technician can identify potential problems early, preventing minor issues from escalating into major breakdowns. This proactive approach is far more cost-effective than emergency repairs.
Cleaning or replacing your air filter every 1-3 months is equally vital. A clogged filter restricts airflow, forcing your AC unit to work harder and consume more energy. This increased strain leads to premature wear and tear on components, potentially causing water leaks from your vents. “Ignoring filter maintenance is a common cause of AC failures and decreased efficiency.” Consider upgrading to a high-efficiency filter for improved air quality and system protection.
Beyond filter changes, consider the outdoor unit. Keep the area around your condenser unit clear of debris, vegetation, and obstructions. Proper airflow is essential for optimal cooling and prevents overheating. This simple step can drastically improve your system’s performance and longevity. Regularly inspect for any signs of damage, such as loose wiring or damaged fins. Addressing these promptly can prevent costly repairs later, ensuring your air conditioner runs smoothly and efficiently for years to come.
Safety Precautions When Dealing with AC Leaks

Turning Off the Power to the AC Unit
Before attempting any repairs on your air conditioner, always prioritize safety. The first, and arguably most crucial, step involves turning off the power to the unit. This prevents electrical shocks, which can be incredibly dangerous and even fatal. Never assume the unit is off; always verify.
Locating your air conditioner’s breaker is the next step. This is usually found in your home’s electrical panel, often located in the basement, garage, or utility closet. The breaker for your AC unit will likely be clearly labeled. However, if you’re unsure, consult your home’s electrical schematic or contact a qualified electrician. Never attempt to work on electrical components without fully understanding the system. Incorrectly handling electrical systems can lead to serious injury or damage to your home.
Once you’ve located the breaker, switch it to the “off” position. “This completely cuts the power supply to the air conditioning unit, minimizing the risk of electric shock during your inspection and repair efforts.” After switching off the breaker, wait a few minutes to allow the capacitor within the unit to fully discharge. This extra precaution ensures complete power cessation and reduces the risk of injury. Remember, safety is paramount when dealing with any electrical appliance, particularly those involving high voltage.
Avoiding Electrical Hazards
Before attempting any AC repair, especially when dealing with water leaks, prioritize safety. Always disconnect the power to your air conditioner at the breaker box before starting any work. This simple step prevents potential electrical shocks, a serious hazard when working with wet components. Never assume the power is off; double-check using a non-contact voltage tester.
Water and electricity are a dangerous combination. A faulty connection, corroded wiring, or a leak near electrical components could lead to a short circuit, causing sparking, fire, or even electrocution. “Ignoring this precaution could result in severe injury or even death,” so make safety your top priority. Remember, even seemingly minor leaks can create hazardous conditions. This is especially true if water comes into contact with exposed wires or the electrical system itself.
If you’re uncomfortable working with electrical systems, or if the problem appears complex, call a qualified HVAC technician. Professionals possess the necessary knowledge, tools, and safety equipment to diagnose and repair your AC leak safely and efficiently. They are trained to handle electrical hazards and will ensure the job is completed without risking injury or further damage to your system. “Attempting repairs beyond your skill level is never worth the risk.” Professional help is always recommended for complex issues or when safety concerns exist.
Handling Water Safely
Water from a leaking AC unit can present several hazards. Never assume the water is simply condensation. It could be contaminated with mold, mildew, or even refrigerant, which can be toxic if inhaled or ingested. Always wear protective gear, including rubber gloves and eye protection, before handling any standing water. This protects you from potential contaminants and keeps you safe while investigating the source of the leak.
Proper cleanup is crucial. Use absorbent materials like towels or shop rags to soak up the water. Avoid using a vacuum cleaner unless it’s specifically designed for wet applications, to prevent electrical shock. Once the immediate spill is contained, thoroughly disinfect the area with a solution of bleach and water (a 1:10 ratio is effective). This is particularly important if the water has been standing for a while. “Allow the area to air dry completely before attempting any repairs to prevent mold growth.”
Remember, safety is paramount. If you’re uncomfortable handling the situation yourself, or if the leak is significant, call a qualified HVAC technician immediately. Ignoring a leak can lead to more serious problems, including water damage to your home, electrical hazards, and health risks. A professional has the expertise and tools to safely diagnose and repair the problem, avoiding potential dangers associated with electrical components and refrigerant handling. Don’t hesitate to seek professional help; it’s always better to be safe than sorry.
Cost Considerations: Repair vs. Replacement

Estimating the Cost of AC Repairs
Pinpointing the exact cost of AC repairs for a dripping vent is tricky. Labor rates vary widely by location and technician experience. A simple fix, like tightening a loose connection, might only cost you $50-$100. However, more complex issues, such as a refrigerant leak requiring extensive repairs or component replacement, can easily reach $300-$500 or more. Always get multiple quotes before committing to any work.
The cost will also depend heavily on the type of AC unit you own. Older units may require more specialized parts, pushing the price upward. Furthermore, the severity of the leak matters. A small drip might suggest a minor problem, while a steady stream indicates a potentially larger, costlier issue. Don’t hesitate to ask your technician for a detailed breakdown of the repair costs before proceeding. This should include parts, labor, and any applicable service fees.
Remember, “preventative maintenance can significantly reduce the likelihood of costly repairs.” Regular inspections and cleaning can help identify minor problems early on, preventing them from escalating into major, expensive headaches. Investing in annual maintenance checks is a cost-effective way to extend the lifespan of your AC unit and avoid the surprise of unexpected and significant repair bills related to water leaks or other problems.
Factors Influencing Repair Costs
Several factors significantly impact the final cost of repairing your air conditioner’s water leak. The most crucial is the source of the leak. A simple clog in the condensate drain line might only require a minor cleaning, costing as little as $50-$150. However, a more complex issue like a refrigerant leak or a faulty drain pan could involve significantly more expensive parts and labor. Remember to obtain multiple quotes to compare pricing for similar services.
Your location also plays a role. Labor costs vary by region, with higher costs in major metropolitan areas compared to smaller towns. Furthermore, the age and make of your AC unit matters. Older units might require more specialized parts, which could be harder to source and consequently more expensive. Repairing a vintage unit might even cost more than purchasing a new, energy-efficient model. “Always factor in the potential longevity of repairs against the overall cost of replacement.”
Finally, the expertise of the HVAC technician influences pricing. While a less experienced technician might offer lower initial costs, their work could be substandard and lead to further issues down the line. Choosing a reputable, licensed professional, even if slightly more expensive initially, ensures higher quality repairs and potentially extends your AC’s lifespan and do AC replacement sw. Consider the potential long-term savings of a well-executed repair versus a cheaper, potentially less effective one.
Evaluating the Need for AC Replacement
Deciding whether to repair or replace your air conditioner is a significant financial decision. A simple repair for a dripping AC vent, such as tightening a condensate line connection, might only cost a few dollars in parts and an hour of labor. However, if the dripping signals a more serious issue—like a failing condenser coil, compressor problems, or refrigerant leaks—repair costs can quickly escalate. Consider the age of your system. Units older than 10-15 years often become increasingly expensive to maintain.
The age of your AC unit is a key factor. Repairing an older system might seem cost-effective initially, but frequent repairs are more likely. “These repeated repairs can ultimately exceed the cost of a new, energy-efficient unit over its lifespan,” making AC replacement the more prudent long-term investment. Furthermore, older systems often lack the energy-saving features of modern models, leading to higher utility bills, a hidden cost you should factor in. Check your unit’s SEER (Seasonal Energy Efficiency Ratio) rating; a lower rating indicates higher operating costs. Before making a decision, obtain multiple quotes from reputable HVAC technicians.
These quotes should detail the necessary repairs and their associated costs. Compare these repair estimates to the cost of a new system, including installation. “This comparison will help you make an informed choice based on your budget and the long-term value proposition.” Consider financing options available for new AC purchases; many companies offer attractive payment plans to ease the financial burden of replacement. Remember, a properly functioning air conditioner is crucial for comfort and health, justifying the investment in a suitable solution.


Comments