Why Your AC Unit Outside Isn & Kicking On: A Troubleshooting Guide
- DreamDen AI Editorial Team
- Aug 25, 2025
- 17 min read


Initial Checks: The Quick Wins
Checking the Power Supply: Breaker Box and Unit Power Switch
Before you call an expensive AC repair technician, check the most obvious things first. A surprising number of “broken” AC units are simply suffering from a power outage. Start by locating your home’s main electrical breaker box. This is usually located in your garage, basement, or utility closet. Look for a breaker specifically labeled for your air conditioning unit; it’s often clearly marked “AC,” “Air Conditioner,” or with a similar designation. Is the breaker switched to the “off” position? If so, carefully flip the switch to the “on” position. If the breaker trips immediately, there might be a more serious electrical problem needing professional attention. Don’t force anything; call an electrician.
Next, proceed to the outdoor unit itself. Many units have a power switch located on the unit’s exterior. This switch serves as a convenient on/off for the unit. Sometimes it may be inadvertently turned off, especially during storms or periods of non-use. Ensure this switch is in the “on” position. If you find the switch is tripped, try resetting it. However, if it keeps tripping immediately after switching it on, resist the urge to repeatedly flip it. “This usually indicates a more significant fault, such as a short circuit or a failing compressor, demanding professional evaluation.” Ignoring this crucial detail might lead to further damage.
Finally, if the breaker is on and the outdoor unit’s power switch is on, it’s time to move to the next step of troubleshooting. However, if resetting the breaker or the outdoor unit’s power switch fails to restore power to your AC unit, it’s a good indication the issue is more complex, and professional assistance is strongly advised. Remember, safety first! Always prioritize safety when dealing with electrical components; if you are unsure about any step, consult a qualified HVAC professional.
Examining the Thermostat: Settings, Battery, and Connections
First, check your thermostat’s settings. Is the system set to “cool”? Is the temperature set lower than the current room temperature? A simple oversight can be the culprit. Many modern thermostats have clear digital displays showing the current temperature and the set temperature. Compare these to ensure your AC unit is receiving the correct instructions to activate. If the settings are correct, then move to the next check.
Next, consider the thermostat’s battery. A low or dead battery can prevent the thermostat from sending signals to your outdoor AC unit, preventing it from starting. This is a common problem, especially with older models. Many programmable thermostats use standard AA or AAA batteries; replace them with fresh batteries of the same type and voltage. “If this solves the problem, you’ve saved yourself a potential service call!” After replacing the batteries, wait a few minutes to see if the unit activates.
Finally, inspect the thermostat’s wiring and connections. Loose or corroded wires can interrupt the electrical signal between the thermostat and your outdoor unit. Carefully examine the wires at both the thermostat and the air handler (the indoor portion of your HVAC system). Look for any loose connections or signs of corrosion (green or white powdery buildup). If you find any issues, you may need to tighten the connections or consult a qualified HVAC technician. Never attempt electrical work if you are unsure how to proceed safely.
Inspecting the Air Filter: A Clogged Filter's Impact on Outdoor Unit Operation
A surprisingly common reason your outdoor AC unit isn’t starting is a simple, easily overlooked culprit: a clogged air filter. This seemingly minor issue can have a significant impact on your system’s operation. A dirty filter restricts airflow, leading to increased pressure within the system. This pressure build-up can trigger safety mechanisms, preventing the outdoor unit from turning on to protect the compressor and other components from damage.
Think of your air conditioner as a delicate balance. The indoor and outdoor units work together in a carefully choreographed dance of air pressure and refrigerant flow. A clogged filter disrupts this balance. The system struggles to maintain optimal airflow, which means the outdoor unit’s crucial functions are compromised. It might attempt to start but will quickly shut down due to the abnormal resistance. “Ignoring a clogged filter can lead to costly repairs down the line, so regular filter checks are essential.”
Regular filter replacement or cleaning is crucial for the health and longevity of your entire AC system. Consult your air conditioner’s user manual for the recommended replacement schedule. Generally, a monthly check and cleaning, or a replacement every 1-3 months, depending on usage and environmental factors, will prevent this easily avoidable problem. Remember, a clean air filter not only improves your AC’s efficiency and extends its lifespan but also ensures its safe and effective operation, preventing frustrating situations like your outdoor unit refusing to start.
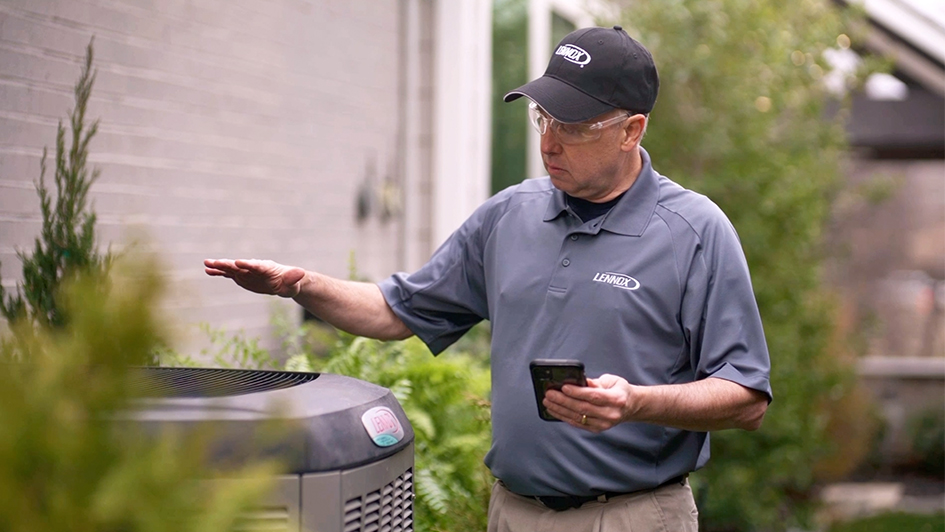
Condenser Unit Inspection: What to Look For

Condenser Fan Motor Check: Visual Inspection and Testing
First, visually inspect the condenser fan motor for any obvious damage. Look for signs of burning, loose wiring, or any physical obstructions blocking the fan blades. A damaged motor is a common reason why your outdoor AC unit won’t start. Even a small obstruction can prevent the fan from spinning freely, leading to overheating and a malfunction.
Next, carefully check the condenser fan motor’s capacitor. This component stores energy to help the motor start. A bulging or leaking capacitor is a strong indicator of failure and needs immediate replacement. Remember, capacitors can store a dangerous electrical charge, even when disconnected. If you are not comfortable working with electrical components, call a qualified HVAC technician. “Attempting capacitor replacement without proper training is extremely dangerous.”
Finally, if you are comfortable with basic electrical testing, you can use a multimeter to check the voltage at the motor’s terminals. With the power to the unit OFF, carefully test the continuity of the motor windings. A multimeter can determine if the motor itself is receiving power or if there’s a short or open circuit, preventing it from running. Remember to always disconnect power before performing any electrical checks. “Safety is paramount when working with electrical appliances, so prioritize your well-being.”
Checking the Condenser Coils for Debris and Damage
The condenser coils are crucial for your AC unit’s operation. They release heat absorbed from inside your home. Clogged coils drastically reduce efficiency and can lead to compressor failure. Regular cleaning is essential for optimal performance and longevity.
Inspect the coils carefully for any debris buildup. Leaves, grass clippings, and other organic matter are common culprits. Dirt and dust also accumulate, hindering heat dissipation. Use a garden hose with a low-pressure nozzle to gently rinse away loose debris. Never use a pressure washer, as this can damage the delicate fins. For stubborn buildup, consider using a coil cleaning solution specifically designed for air conditioning units, following the manufacturer’s instructions. This step significantly improves cooling capacity and extends the life of your condenser unit.
Damaged coils are another major concern. Bent or broken fins restrict airflow. This reduces cooling performance and can lead to increased energy consumption. You might notice some damage immediately, such as significant bends. However, minor damage might require closer inspection. Use a fin comb to carefully straighten any bent fins. For extensive damage, professional repair is necessary. “Ignoring damaged coils can lead to irreversible harm and costly repairs down the line,” so addressing any issues promptly is crucial for keeping your outdoor AC unit running efficiently.
Identifying Refrigerant Leaks: Signs and Professional Assistance
Refrigerant leaks are a common reason why your outdoor AC unit, or condenser, won’t start. Low refrigerant pressure prevents the system from functioning correctly. Identifying a leak requires careful observation and, often, professional help.
Look for signs of oil stains or discoloration near the unit’s connections. These could indicate a refrigerant leak, as refrigerant oil often escapes with the refrigerant itself. A hissing sound coming from the unit, especially near joints or connections, is another strong indicator. Remember, however, that some sounds are normal. If you’re unsure, it’s best to call a professional. Attempting DIY repairs on a refrigerant leak can be dangerous and may void your warranty.
“Finding and fixing refrigerant leaks requires specialized tools and knowledge of EPA-approved procedures for handling refrigerants.” A qualified HVAC technician possesses the necessary equipment, such as electronic leak detectors, and the expertise to safely identify and repair the leak, ensuring your system operates efficiently and safely. They can also properly recharge your system with the correct amount of refrigerant. Ignoring a leak can lead to further damage to your AC unit and significantly increase repair costs. Don’t hesitate to call for professional assistance when you suspect a refrigerant problem.
Understanding the Electrical System

Capacitor Troubles: Recognizing and Addressing Issues
The capacitor is a crucial component in your air conditioner’s startup system. It’s responsible for providing the initial surge of power needed to get the compressor running. A faulty capacitor is a common reason why your outdoor unit won’t start. Symptoms include a humming sound from the unit, but no actual cooling. This indicates the capacitor is struggling to deliver the necessary power.
Identifying a bad capacitor often requires visual inspection. Look for bulging or leaking on the capacitor’s casing. These are clear signs of failure. Never attempt to test a capacitor yourself unless you’re a qualified HVAC technician. Capacitors store a significant electrical charge, even when disconnected, posing a serious risk of electric shock. A multimeter can check capacitance, but improper use can be dangerous.
Replacing a capacitor is a relatively straightforward repair, though again, it’s best left to professionals. “Improper replacement can lead to further damage to your AC unit or even create a fire hazard,” so it’s crucial to prioritize safety. While purchasing a replacement capacitor is inexpensive, the risk of injury outweighs the cost savings of DIY repair. Contact a licensed HVAC technician for diagnosis and repair. They possess the necessary expertise and safety equipment to handle this task correctly.
Compressor Issues: Diagnosing Problems
The compressor is the heart of your AC unit, responsible for circulating refrigerant. A malfunctioning compressor is a common reason your outdoor unit won’t start. Listen carefully near the unit; a loud, unusual noise, or a complete lack of sound, could indicate a problem. A seized compressor, for instance, won’t even attempt to start.
Diagnosing compressor issues requires some careful observation. Check for any visible damage to the compressor itself. Look for signs of leaking refrigerant, which often manifests as oily residue or frost buildup. “These are crucial indicators of a serious problem requiring professional attention.” Never attempt to repair a compressor yourself; this is a task best left to qualified HVAC technicians.
If you suspect a compressor problem, the next step involves checking the overloads. These are safety devices designed to prevent the compressor from overheating. They may have tripped due to a power surge or another malfunction. If the overloads are tripped, reset them cautiously (consult your unit’s manual). However, if they trip again immediately, it signifies a more serious underlying issue, and professional assistance is absolutely necessary. Ignoring compressor problems can lead to expensive repairs or complete unit failure.
Contactor Problems: Symptoms and Resolution
A malfunctioning contactor is a common reason your outdoor AC unit won’t start. Contactors are electrically operated switches that control the flow of high-voltage power to the compressor and other components. If the contactor fails, the unit simply won’t turn on, even if the thermostat is set correctly. Look for signs like a clicking sound from the unit, but no actual start-up. This is often caused by a weak contactor coil.
Troubleshooting a problematic contactor often involves visual inspection. Check for burned contacts, visible damage, or anything loose. Sometimes, simply tightening the connections can resolve the issue. If the contacts appear pitted or burnt, you’ll likely need a replacement. “Remember to always disconnect the power before attempting any repairs, to avoid serious electrical shock.” Furthermore, if the clicking sound is weak or intermittent, the contactor coil itself might be failing, requiring a full contactor replacement.
Replacing a contactor is generally straightforward, though it involves working with high voltage. Unless you’re experienced with electrical work and understand safety protocols, calling a qualified HVAC technician is recommended. Improper handling can lead to electrical shock or damage to other components. A professional possesses the expertise and safety equipment to perform the repair correctly and efficiently. They can quickly diagnose the problem and ensure your AC unit is safely restored to working order.
Beyond the Basics: Advanced Troubleshooting
Pressure Switches: Function and Troubleshooting
Your air conditioner relies on several safety mechanisms, and pressure switches are key among them. These switches monitor the refrigerant pressure within the system. Low pressure indicates a refrigerant leak or other serious problem, preventing the compressor from starting to avoid damage. High pressure indicates a blockage or other malfunction. If the pressure is outside the acceptable range, the switch will prevent the unit from operating.
Troubleshooting pressure switches requires some technical knowledge and safety precautions. First, consult your AC unit’s manual to locate the pressure switches. They’re usually near the compressor or condenser coil. Using a manifold gauge set, carefully check the high and low side pressures. Compare your readings to the manufacturer’s specifications found in your owner’s manual or on a sticker on the unit. Discrepancies could indicate a refrigerant leak, compressor failure, or a clogged condenser coil. Remember: always handle refrigerants with care, as they can be dangerous.
If the pressure readings are outside the acceptable range, don’t attempt to fix the switch yourself unless you have extensive HVAC experience. “Improper handling can cause serious damage or injury,” so it is crucial to call a qualified HVAC technician. A professional can accurately diagnose the underlying problem, repair or replace the faulty component, and recharge the system with the correct amount of refrigerant. Ignoring pressure switch issues can lead to costly repairs down the line, or even complete system failure.
Frozen Evaporator Coils: Causes and Consequences
Frozen evaporator coils are a significant reason your outdoor AC unit might not be working. This ice buildup restricts airflow, preventing the system from effectively cooling and ultimately causing the unit to shut down to prevent damage. This is a common problem, especially in humid climates or when the air filter is clogged, restricting airflow and causing the coils to freeze.
Several factors contribute to frozen evaporator coils. A dirty air filter is a primary culprit. It restricts airflow, reducing the coil’s ability to absorb heat. Insufficient refrigerant is another major cause. Low refrigerant levels mean the system cannot absorb enough heat, leading to freezing. Furthermore, a malfunctioning blower motor could also be responsible. The blower is crucial in moving air across the coils. If it’s not working properly, cold air remains on the coils, forming ice. “Regular maintenance, including filter changes and refrigerant checks, is crucial to preventing this issue.”
The consequences of frozen evaporator coils can be costly. Continued operation with frozen coils can damage the compressor, a very expensive component to replace. The ice can also damage the fan motor and other parts. “Ignoring a frozen evaporator coil can lead to complete system failure and significant repair bills.” Addressing the problem quickly is essential to preventing further damage and maintaining the efficiency of your air conditioning system. Remember to always consult a qualified HVAC technician if you suspect a frozen evaporator coil; attempting repairs yourself could worsen the problem.
Electrical Wiring Problems: Safety Precautions and Diagnostics
Before attempting any electrical work, prioritize safety. Always switch off the power to the outdoor unit at the breaker box. Never work on live electrical components. A seemingly minor mistake can lead to serious injury or even death. Consult a qualified HVAC technician if you’re uncomfortable working with electricity. Remember, your safety is paramount.
Inspect the wiring connections at the condenser’s disconnect box. Look for loose, corroded, or damaged wires. Tighten any loose connections carefully. If you find corrosion, consider cleaning the terminals with a wire brush and applying a dielectric grease to prevent future corrosion. Take photos before and after any adjustments for reference. Significant damage requires professional attention.
If the wiring appears intact, check the circuit breaker itself. A tripped breaker will prevent power from reaching the unit. Reset the breaker; if it trips again immediately, there’s a persistent electrical fault. This indicates a more serious problem, possibly a short circuit within the unit or wiring itself. “In this case, immediately cease troubleshooting and call a licensed electrician or HVAC professional.” Attempting to diagnose and repair this yourself could be extremely dangerous.
When to Call a Professional HVAC Technician

Recognizing Situations Beyond DIY Capabilities
Certain AC problems require professional expertise. Attempting repairs yourself could worsen the issue, leading to costly damage. For example, refrigerant leaks demand specialized tools and EPA-certified technicians for safe handling, due to environmental and health risks. Improper handling can void warranties and lead to further complications.
Electrical issues are another area best left to professionals. Working with your home‘s electrical system is dangerous. Incorrect wiring can cause shocks, fires, or even fatalities. If you suspect a problem with the electrical components of your outdoor AC unit, such as the capacitor or compressor, immediately turn off the power and contact a qualified HVAC technician. Don’t risk serious injury attempting DIY repairs.
Finally, complex mechanical problems often require diagnostic equipment and specialized knowledge. Diagnosing issues such as compressor failure, faulty condenser coils, or problems with the expansion valve often necessitate advanced tools and in-depth understanding. “Attempting a repair without the right training and tools can easily lead to further damage and increased repair costs.” Your safest bet is to call a qualified professional for a proper diagnosis and repair.
Safety Precautions: High Voltage and Refrigerant
Working with air conditioning units involves potential hazards. Never attempt repairs if you lack the necessary training and experience. Ignoring safety risks can lead to serious injury or even death. “Your safety should always be the top priority.”
High-voltage electrical components are present within the outdoor unit. Accidental contact can result in severe electric shock. Even seemingly minor repairs can expose you to dangerous voltages. Always disconnect the power supply at the breaker box before attempting any work, and even then, proceed with extreme caution. Consult a professional if you are unsure how to safely disconnect the power.
Furthermore, AC units contain refrigerant, a chemical that can cause serious health problems if inhaled or released improperly. Refrigerant leaks require specialized equipment and knowledge to repair safely. Improper handling can result in environmental damage and potential fines. “Attempting refrigerant repairs yourself is highly discouraged, and potentially illegal, depending on your location and licensing requirements.” Professional HVAC technicians are trained to handle refrigerant safely and efficiently, preventing both personal harm and environmental consequences.
Finding a Qualified HVAC Contractor: Recommendations and Considerations
Finding a reliable HVAC contractor is crucial for ensuring the longevity and efficiency of your air conditioning system. Start by checking online reviews and ratings on sites like Yelp or Angie’s List. Look for contractors with consistently high ratings and numerous positive comments. Pay close attention to details about their responsiveness, professionalism, and the quality of their work. Don’t hesitate to check references from previous clients.
Next, verify the contractor’s licensing and insurance. A properly licensed contractor demonstrates a commitment to meeting industry standards and adhering to safety regulations. Their insurance protects you in case of accidents or damage during the repair process. “This is a crucial safeguard for both your property and your personal well-being.” Inquire about their experience with your specific type of AC unit – some specialize in certain brands or models, offering a deeper understanding of your system’s unique needs.
Finally, request a detailed estimate upfront. A reputable contractor will clearly outline all costs, including labor, parts, and any applicable fees. Avoid contractors who are unwilling to provide this information or who offer unusually low prices. “Remember, a cheaper price doesn’t always equate to better value; prioritize experience and a proven track record over the lowest bid.” Compare several estimates before making a decision to ensure you’re receiving a fair price for the services needed to fix your outdoor AC unit.
Preventative Maintenance: Keeping Your AC Running Smoothly
Regular Cleaning and Inspection Schedule
Establishing a regular cleaning and inspection schedule is crucial for preventing AC unit malfunctions. A simple, twice-yearly routine—once before summer’s heat and again in the fall—can significantly extend your unit’s lifespan and prevent costly repairs. This preventative maintenance minimizes the risk of your outdoor AC unit failing to start. This schedule allows for proactive identification of minor issues before they escalate into major problems.
During these inspections, you should visually check for obstructions around the unit, like overgrown vegetation or debris. Clear away any leaves, grass clippings, or other materials that might restrict airflow. Also, inspect the condenser coils for dirt and grime buildup. Dirty coils significantly reduce efficiency and can lead to overheating, a common cause of AC unit failure. Consider using a coil cleaning brush or compressed air to remove this debris.
Remember, while you can perform some basic cleaning yourself, professional inspections are vital at least once a year. A qualified HVAC technician can identify more complex issues, such as refrigerant leaks, electrical problems, or worn-out components. “Regular professional maintenance dramatically reduces the likelihood of your outdoor AC unit refusing to start, saving you money and stress in the long run.” Scheduling this professional service ensures your system remains at peak performance and extends its service life, preventing unexpected breakdowns.
Importance of Professional AC Maintenance
Regular professional AC maintenance is crucial for preventing major breakdowns and ensuring optimal efficiency. A qualified technician can identify potential problems early, like refrigerant leaks or faulty electrical components, before they escalate into costly repairs. Ignoring this preventative care is like driving your car without oil changes—you’ll eventually face significant issues, impacting both your wallet and comfort.
Professional maintenance goes beyond simple cleaning. Technicians perform thorough inspections, checking for proper airflow, testing refrigerant levels, and cleaning the condenser coil. This ensures your system operates at peak performance, leading to lower energy bills and a longer lifespan. Studies show that regular maintenance can extend the life of your AC unit by several years, saving you thousands of dollars in the long run on replacement costs.
“Scheduling annual professional maintenance is the single best thing you can do to prevent your outdoor AC unit from failing prematurely and keep it running smoothly.” They can also advise on necessary upgrades or repairs to maintain efficiency and prevent unexpected failures. Remember, a small investment in preventative maintenance can prevent much larger repair bills or the need for a complete AC unit replacement, saving you considerable time and money in the long term.
Extending the Lifespan of Your AC Unit
Regular maintenance significantly extends the life of your air conditioning unit. A well-maintained system operates more efficiently, reducing wear and tear on key components. This translates to fewer repairs and a longer lifespan, saving you money in the long run. Consider it an investment in your home comfort and your wallet.
Professional servicing is crucial. Annual inspections by qualified HVAC technicians are recommended. These professionals can identify potential problems early, preventing costly breakdowns. They’ll check refrigerant levels, clean coils, and lubricate moving parts. “Ignoring these checks is like ignoring your car’s oil changes – it will eventually lead to major problems.”
Beyond professional servicing, there are simple things homeowners can do. Keep the area around your outdoor unit clear of debris and vegetation. This ensures proper airflow, preventing overheating and strain on the compressor. Change or clean your air filters regularly, typically every 1-3 months, depending on usage and filter type. This simple step dramatically improves efficiency and reduces stress on the entire system, contributing to a longer, healthier life for your AC unit.
Understanding Your AC Unit: Key Components and Their Functions

Compressor: The Heart of Your AC System
The compressor is the powerhouse of your air conditioning system. Think of it as the heart, pumping refrigerant throughout the system to create cool air. It’s a crucial component, and problems here often mean a non-functioning AC unit. A malfunctioning compressor can lead to a range of issues, from reduced cooling to complete system failure. Regular maintenance, including checking refrigerant levels, is vital for its longevity.
This vital component uses electricity to compress refrigerant gas. This compression process increases the refrigerant’s temperature and pressure. The hot, high-pressure refrigerant then travels to the condenser coils, outside the unit. Here, the heat is released into the outside air. “A faulty compressor is a common reason why your outside AC unit won’t start, leading to a complete lack of cool air inside your home.”
Diagnosing compressor issues requires professional expertise. Attempting DIY repairs can be dangerous, potentially exposing you to high-pressure refrigerant. If you suspect compressor problems—like unusual noises, lack of cold air, or an overheated unit—call a qualified HVAC technician immediately. “Ignoring these signs can lead to more extensive and costly repairs down the line.” They possess the tools and knowledge to properly diagnose and fix the problem safely and efficiently.
Condenser Coil: Heat Exchange and Cooling
The condenser coil is a crucial part of your outdoor AC unit. It’s a network of metal fins and tubes. This component is responsible for releasing the heat absorbed from inside your home. This heat exchange is vital for the cooling process.
Refrigerant, a special fluid, flows through these tubes. It arrives hot and high-pressure from the compressor. The refrigerant then releases its absorbed heat to the outside air. This happens via the condenser coil’s large surface area. The heat dissipates, cooling the refrigerant. “Efficient heat transfer here is critical for optimal AC performance.” A dirty or damaged condenser coil significantly reduces efficiency and can cause your unit to fail to start.
Regular cleaning of the condenser coil is essential. This prevents buildup of dirt, debris, and leaves, which impede heat dissipation. A clogged coil forces the system to work harder. This can lead to compressor overload and premature failure. Consider scheduling annual professional maintenance for optimal performance and longevity. “A well-maintained condenser coil is key to a smoothly running, long-lasting AC unit.”
Evaporator Coil: Indoor Cooling and Dehumidification
The evaporator coil is a crucial part of your air conditioning system’s indoor unit. It’s a network of copper tubing with fins, often located within your air handler or furnace. Refrigerant, in a low-pressure, low-temperature state, flows through this coil.
This cold refrigerant absorbs heat from the air circulating over the coil. This process cools the air, making your home comfortable. Simultaneously, the cold coil causes moisture in the air to condense. This condensation collects in a drain pan and is removed from your home. This dehumidification is a vital function, improving both comfort and air quality, especially in humid climates. For example, areas like the southeastern United States experience significantly high humidity levels, making efficient dehumidification a key selling point for many AC units.
A malfunctioning evaporator coil can drastically reduce cooling efficiency. Problems like restricted airflow due to a dirty coil, or refrigerant leaks, will prevent it from absorbing sufficient heat. Frozen evaporator coils are a common sign of a problem, often caused by restricted airflow or low refrigerant levels. “If your evaporator coil isn’t functioning properly, your AC unit won’t cool your home effectively, regardless of the outdoor unit’s operation.” Regular maintenance, including cleaning the coil and checking refrigerant levels, is essential for optimal performance and prevents costly repairs.


Comments